21 Halloween Nail Art Ideas for Your October Manicure
There’s a meaningful gap between a Halloween manicure with a single painted bat and one that uses actual nail art technique — layered color, controlled texture, dimensional elements — to build something a technician genuinely has to plan for. This guide sits on the more ambitious end of that spectrum, covering Halloween nail art built around specific techniques rather than single motifs alone.
Each entry explains not just the finished look, but the technique behind it — gel layering, wet-on-wet blending, 3D acrylic elements, negative space precision — so you understand what you’re actually asking a nail technician to execute, and why some of these take considerably longer in the chair than a quick painted pumpkin.
Style 1: Wet-on-Wet Blended Sunset Pumpkin
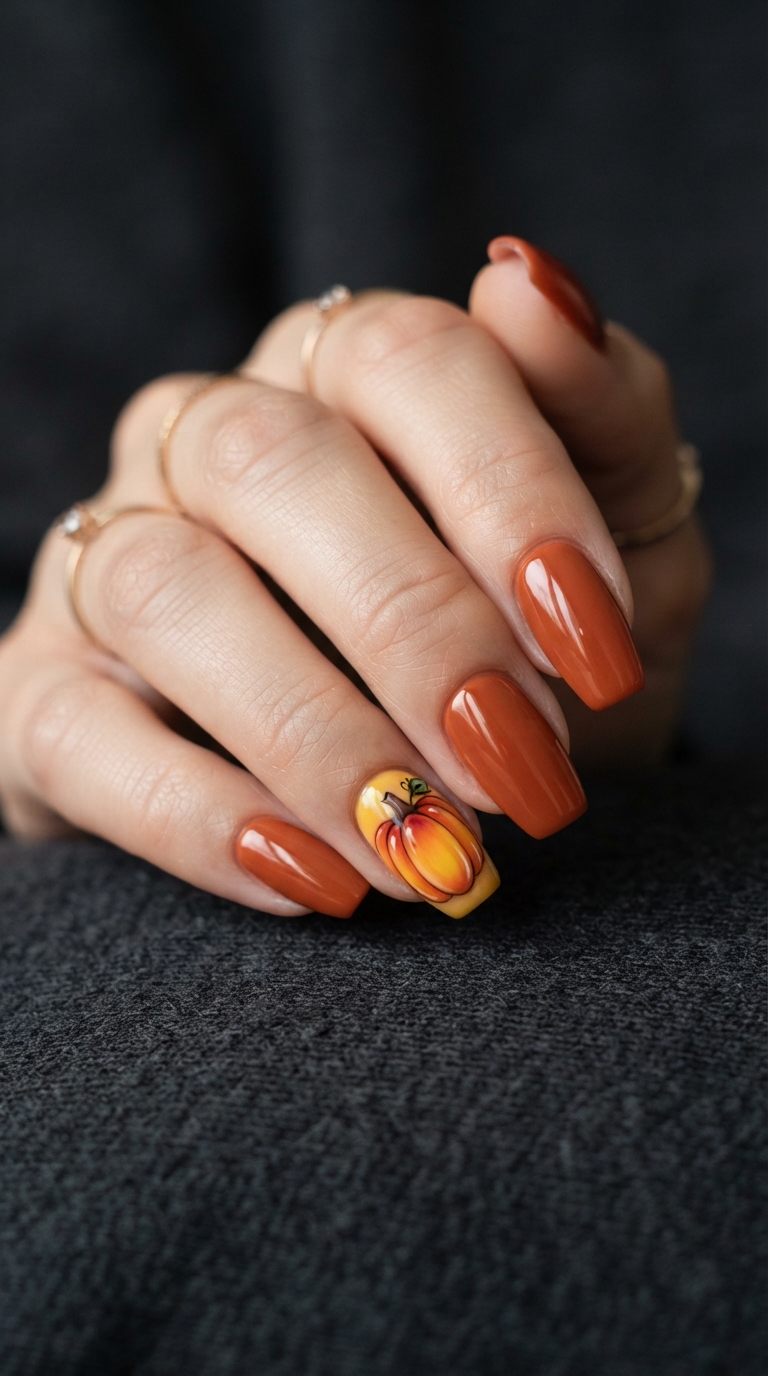
Rather than a flat orange pumpkin shape, this technique blends orange, red, and yellow gel polish together while all three are still uncured, creating a gradient pumpkin with genuine color depth rather than a single flat tone. The blending has to happen quickly, before the gel begins to set, which makes this a technician-dependent skill rather than something easily replicated at home. Best for: Anyone wanting a pumpkin design with real dimension rather than a flat cartoon shape.
Style 2: 3D Acrylic Spider With Raised Legs
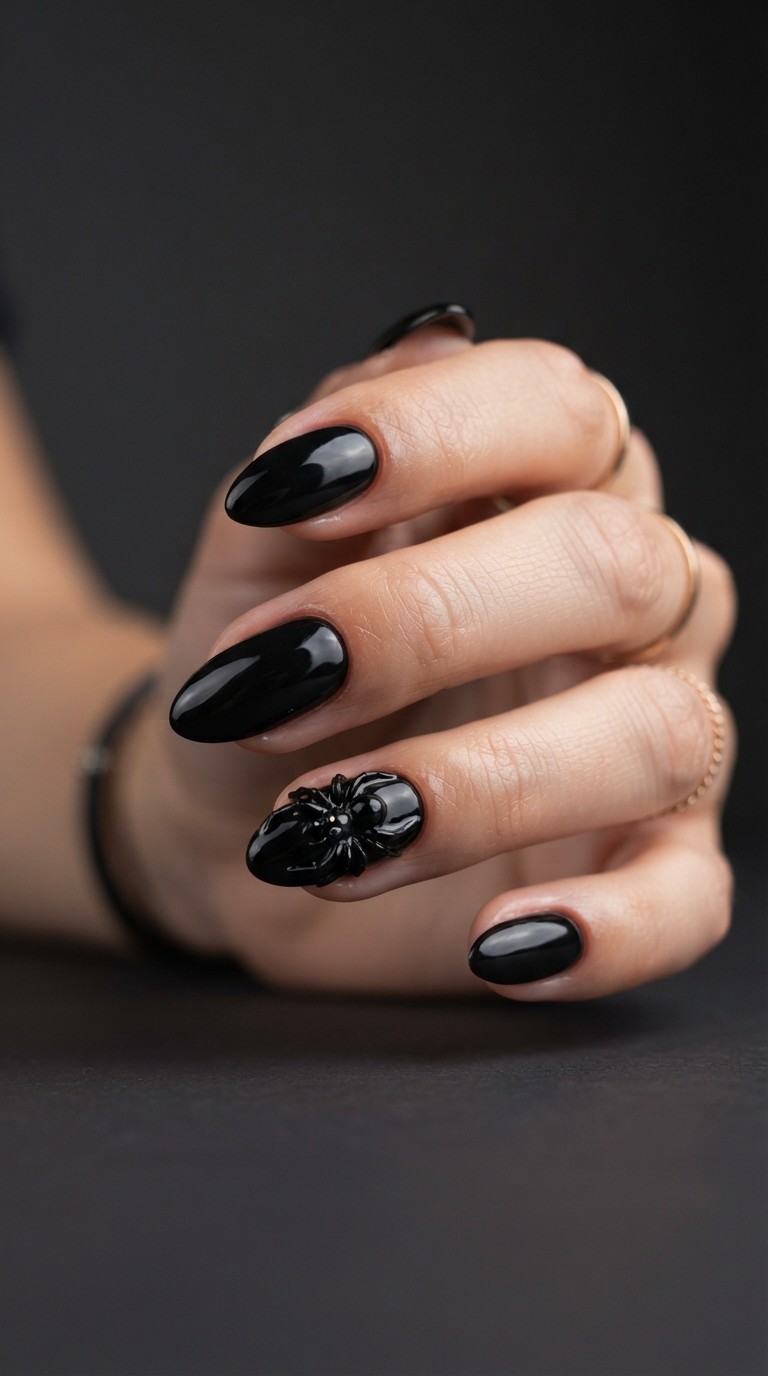
Sculpted directly from acrylic powder rather than painted flat onto the nail, a small 3D spider with genuinely raised, dimensional legs creates a tactile, sculptural element that a two-dimensional painted spider can’t replicate. This technique requires acrylic sculpting skill beyond standard nail art and adds noticeable time to an appointment. Best for: Anyone wanting textural, dimensional nail art rather than flat imagery.
Style 3: Negative Space Spider Web
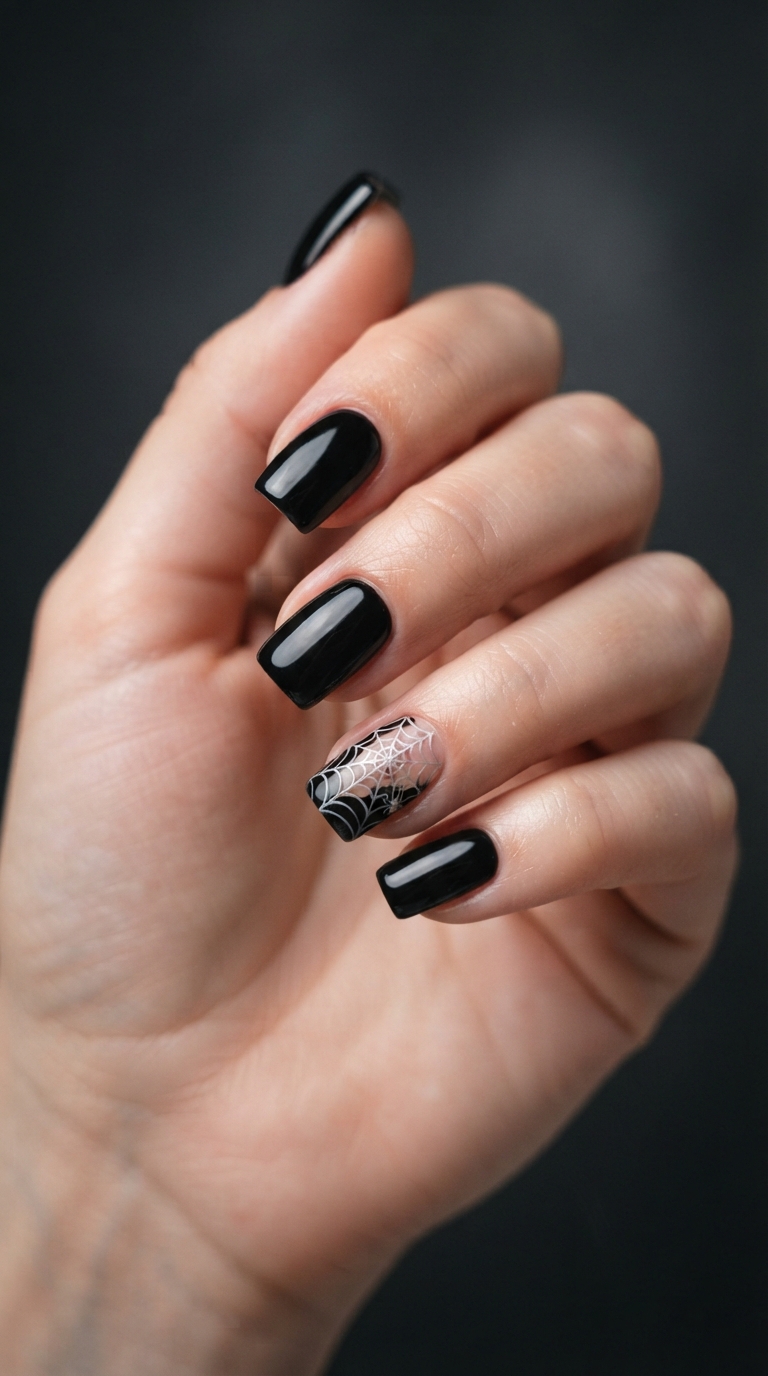
Rather than painting a web onto a solid base, this technique leaves the natural nail or a clear gel base exposed in the web’s pattern, with color applied only around the negative space lines. This requires more precision than a painted web, since the technician is essentially working in reverse — protecting the shape rather than filling it in. Best for: Anyone wanting a modern, architectural take on a classic Halloween motif.
Style 4: Marbled Black-and-Purple Witch’s Brew
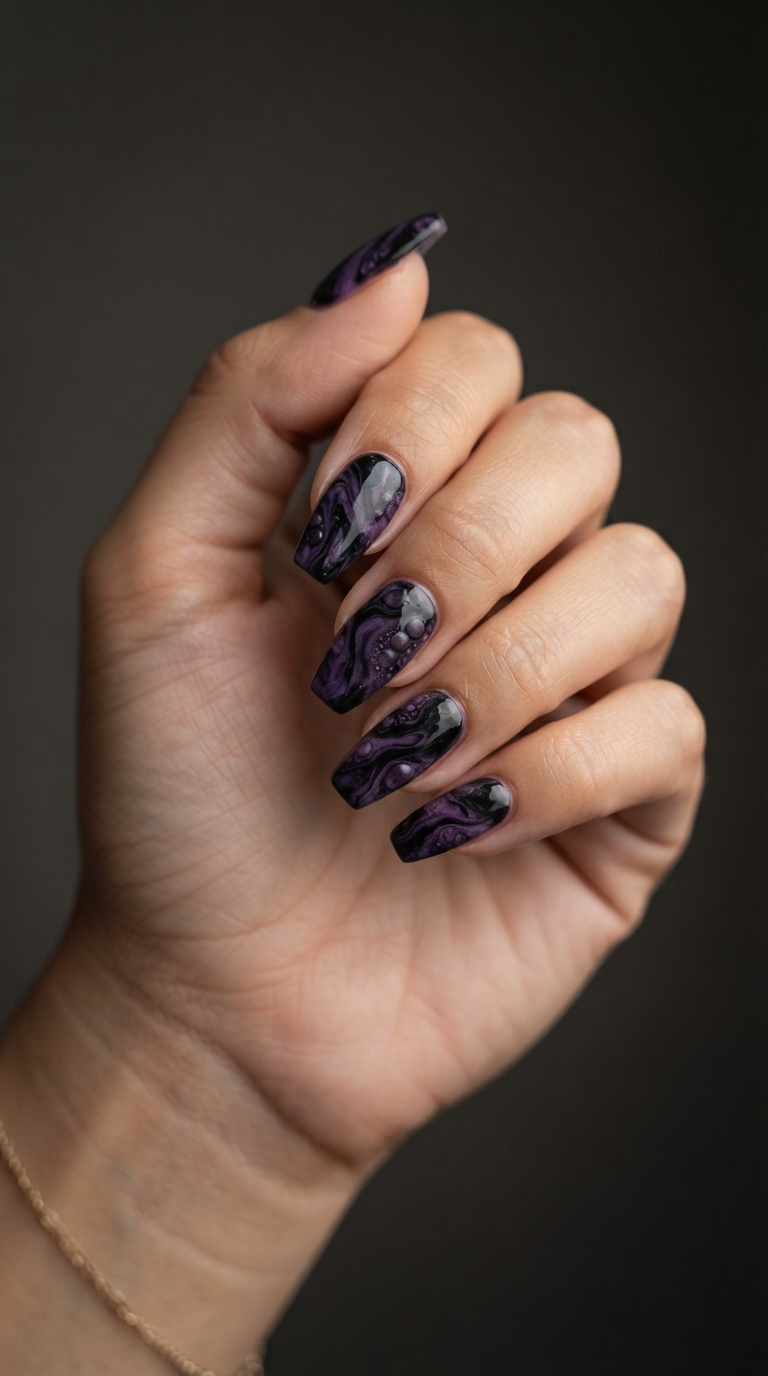
A swirled, marbled blend of black and deep purple gel, achieved by dragging a fine brush through the two colors while wet, mimics a bubbling potion effect without any literal imagery at all. The marbling technique is deliberately imprecise — no two nails look identical, which is part of the intended effect. Best for: Anyone wanting an abstract, moody Halloween look rather than a literal motif.
Style 5: Hand-Painted Detailed Ghost Portrait
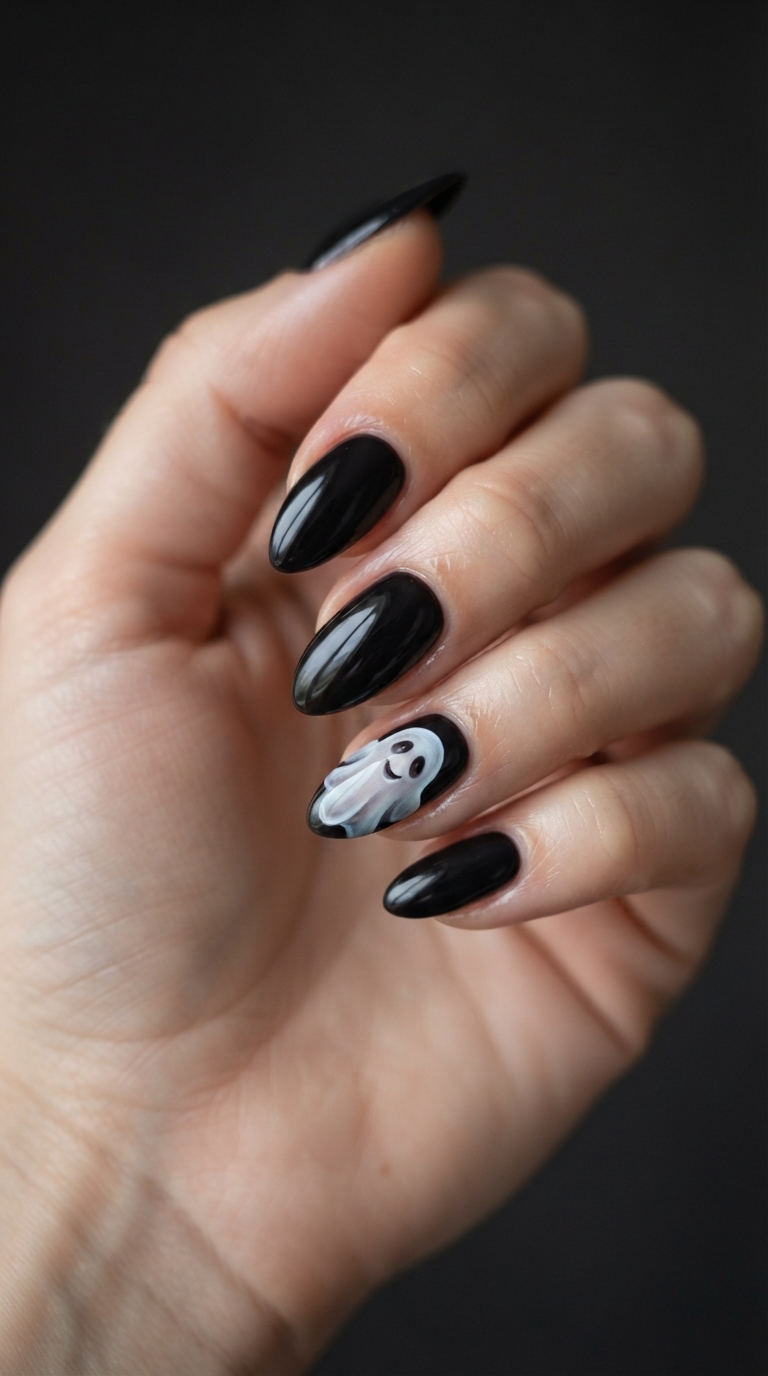
Moving beyond a simple silhouette, this design paints a ghost with shading—subtle grey tones build form and dimension into the shape rather than a flat white outline. This requires genuine hand-painting skill, using a fine detail brush and multiple thin layers to build shading gradually. Best for: Anyone wanting a more illustrated, painterly ghost rather than a graphic silhouette.
Style 6: Chrome Powder Over a Black Base for a Haunted Mirror Effect
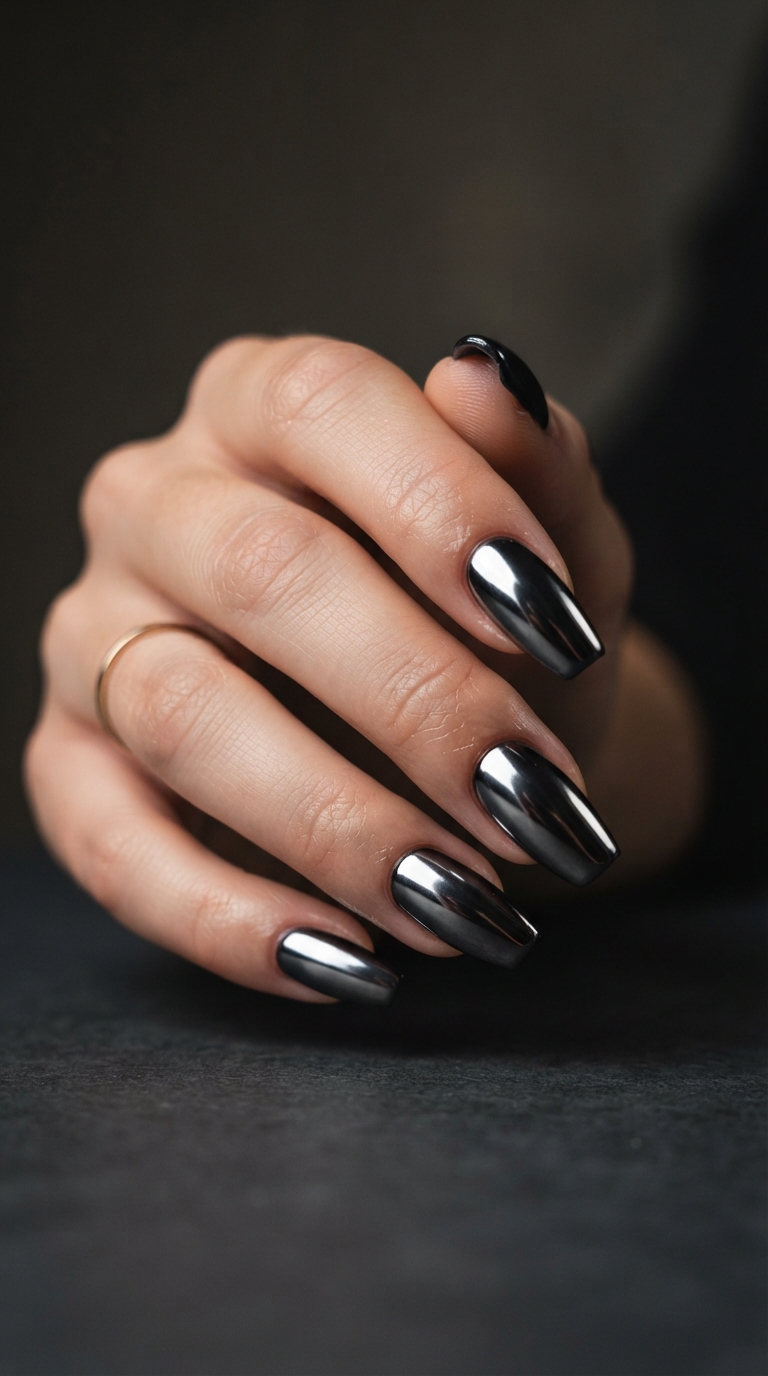
A fine chrome powder applied over a fully cured black gel base creates a mirror-like, almost liquid-metal finish that shifts and reflects light dramatically, evoking a haunted-mirror aesthetic without any painted imagery. The chrome application technique requires a completely smooth, defect-free base underneath, since chrome reveals every surface imperfection. Best for: Anyone wanting a dramatic, reflective finish with genuine visual impact.
Style 7: Layered Gel Pumpkin With Textured Vine Detail
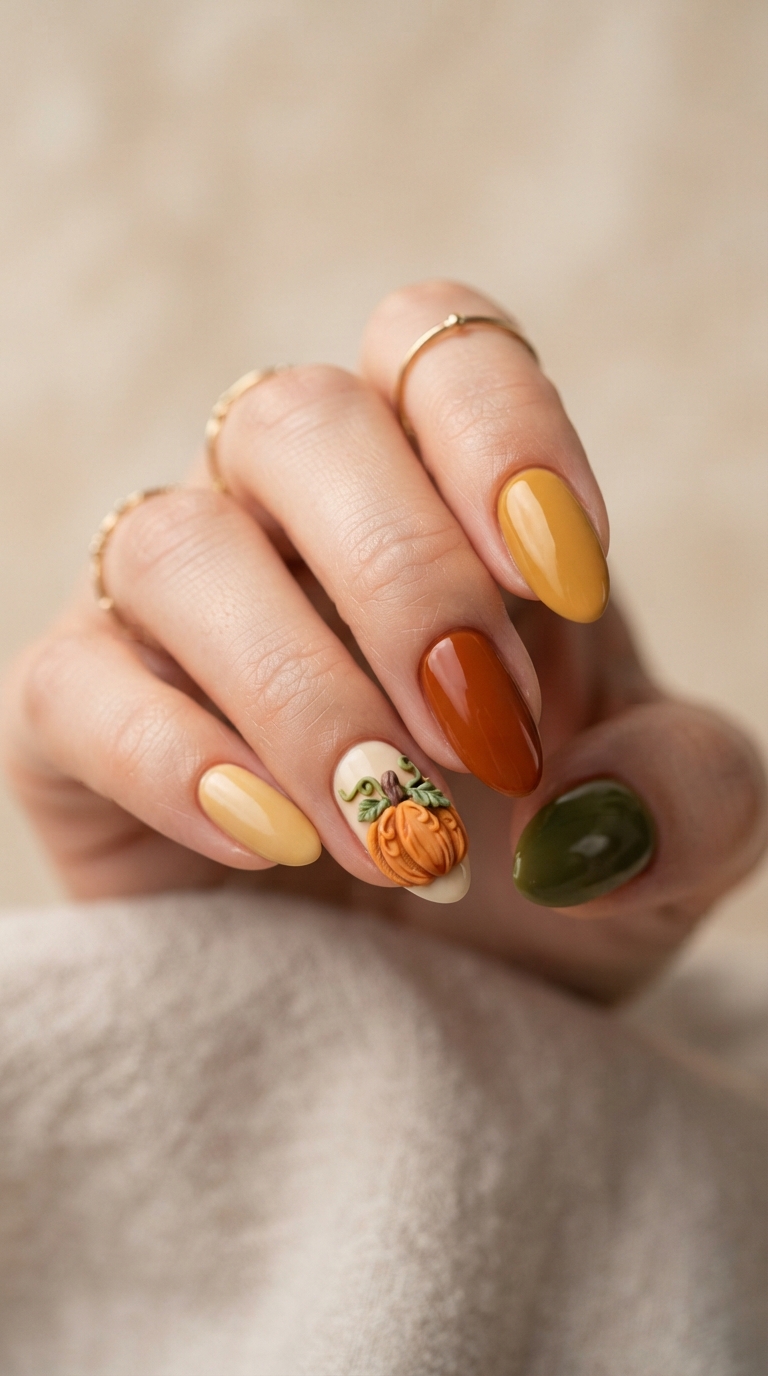
Building a pumpkin shape in multiple thin, cured layers of orange gel, then adding a fine textured green vine on top using a striping technique, creates a raised, dimensional pumpkin rather than a flat painted one. Each layer must fully cure before the next is added, extending the technique’s time investment. Best for: Anyone wanting a pumpkin design with genuine sculptural height.
Style 8: Ombré Fade From Black to Blood Red

A smooth gradient transitioning from deep black at the cuticle to a rich blood red at the tip, achieved with a makeup sponge dabbing the two shades together at the boundary, creates atmospheric depth without any figurative imagery. Achieving a truly seamless blend (no visible banding between the colors) takes technique refinement. Best for: Anyone wanting a moody color story rather than a specific motif.
Style 9: Encapsulated Glitter “Potion Bottle” Accent
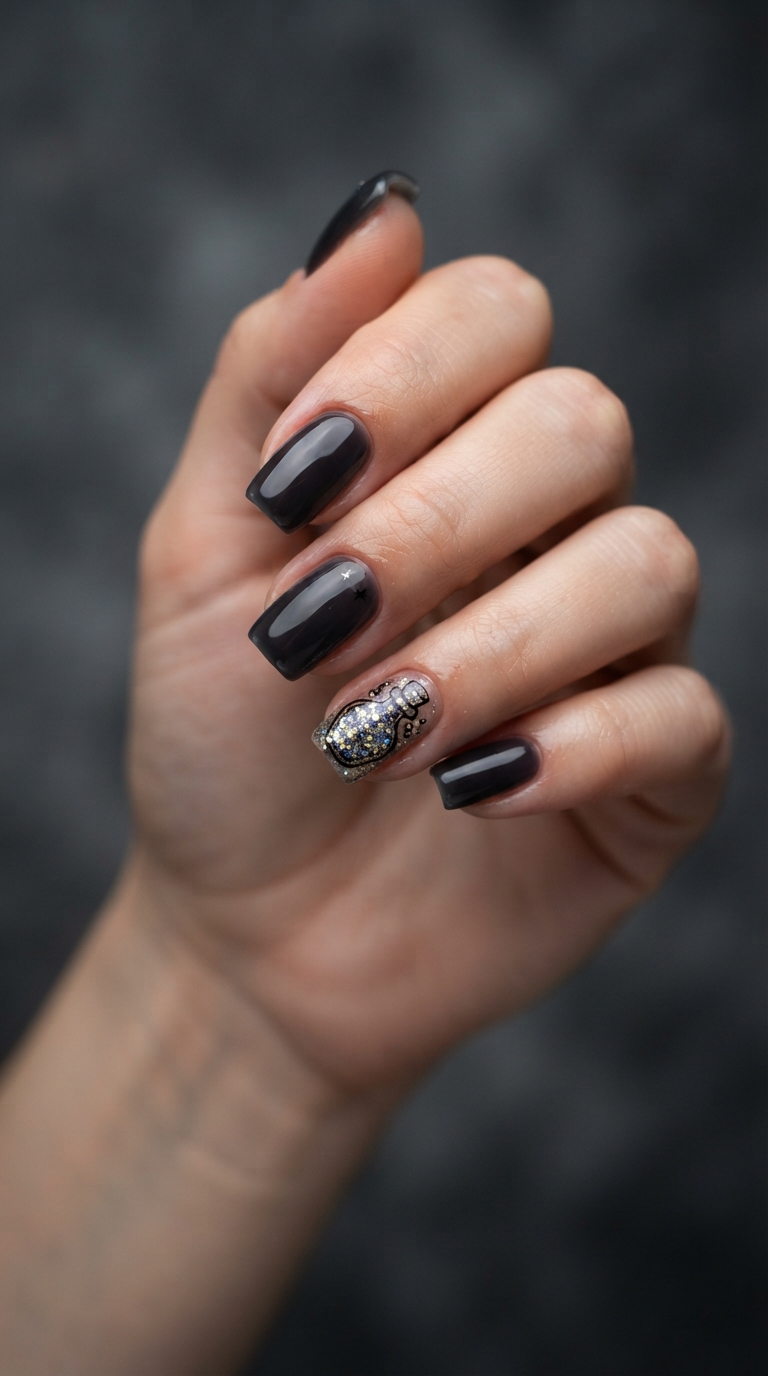
A tiny hand-painted potion bottle outline filled with encapsulated glitter gel — glitter suspended in clear gel and sealed under a topcoat — creates the illusion of a glowing liquid inside the bottle shape. This requires precise outline work plus careful glitter placement before sealing. Best for: Anyone wanting a genuinely detailed, illustrative accent nail.
Style 10: Textured Crackle Overlay Over Deep Orange
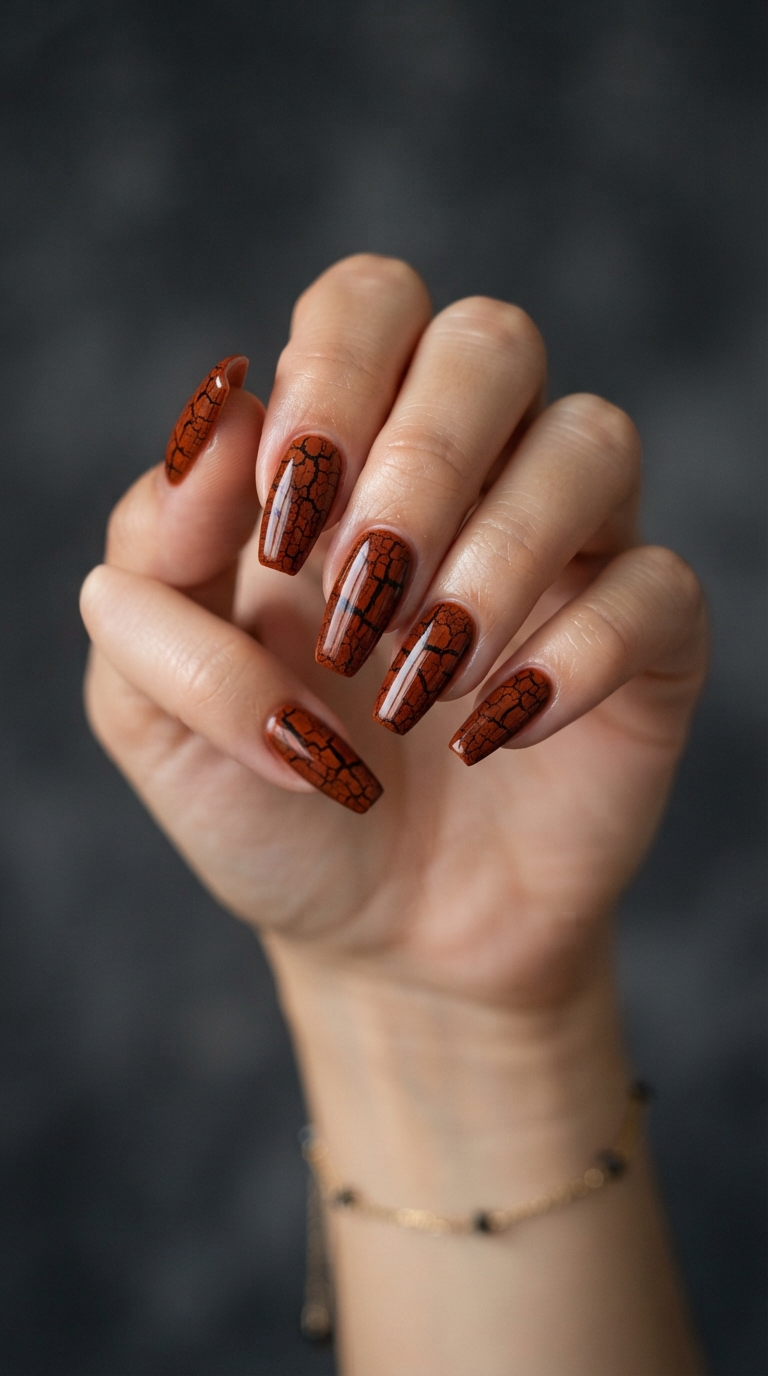
A specialty crackle topcoat applied over a fully cured deep orange base splits and separates as it dries, revealing the color underneath through fine cracks for a weathered, aged effect. The crackle pattern is unpredictable by nature, which is part of the appeal. Best for: Anyone wanting genuine texture without hand-painted detail work.
Style 11: Fine-Line Bat Silhouettes in Formation
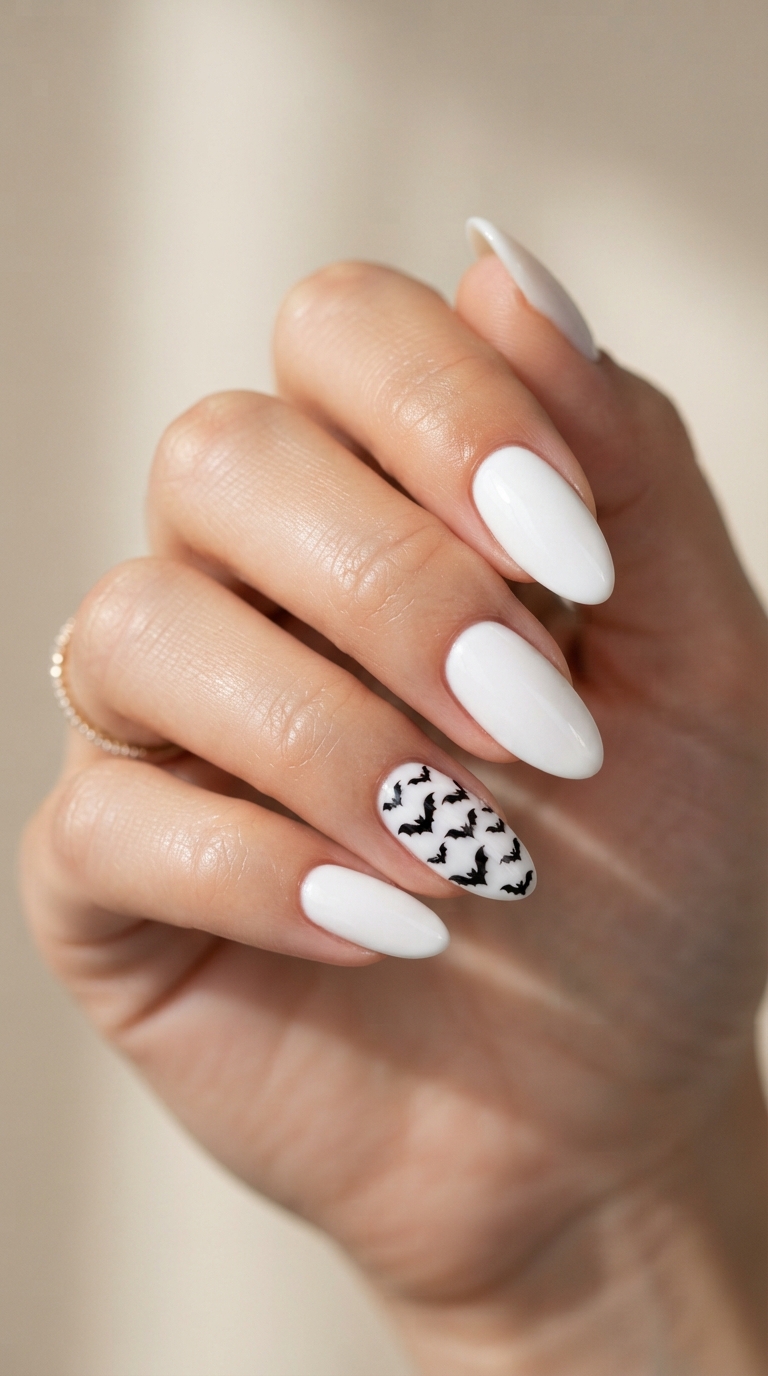
A cluster of small bats painted at varying sizes and angles across one nail, using a fine detail brush for clean, consistent silhouettes, requires more precision than a single bat since inconsistent shapes are immediately noticeable when several appear together. Best for: Anyone wanting a busier, more dynamic single-nail composition.
Style 12: Holographic Web Overlay
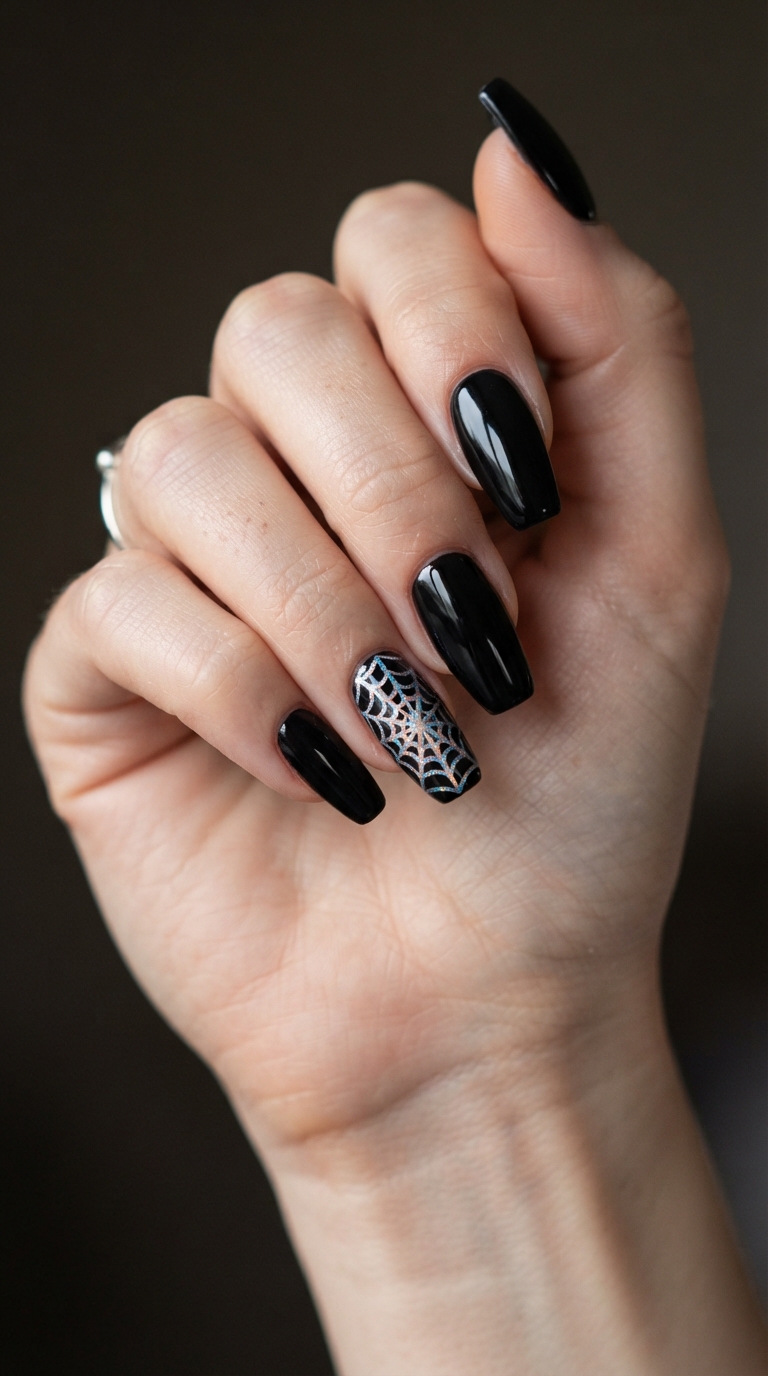
A holographic topcoat applied specifically within a web pattern (rather than across the whole nail) creates a shifting, rainbow-tinted web that looks different depending on the viewing angle, layered over a black base. Precise placement of the holographic effect within the web lines, rather than bleeding outside them, is the technical challenge here. Best for: Anyone wanting an iridescent, modern twist on a classic web design.
Style 13: Gothic Rose and Skull Composition
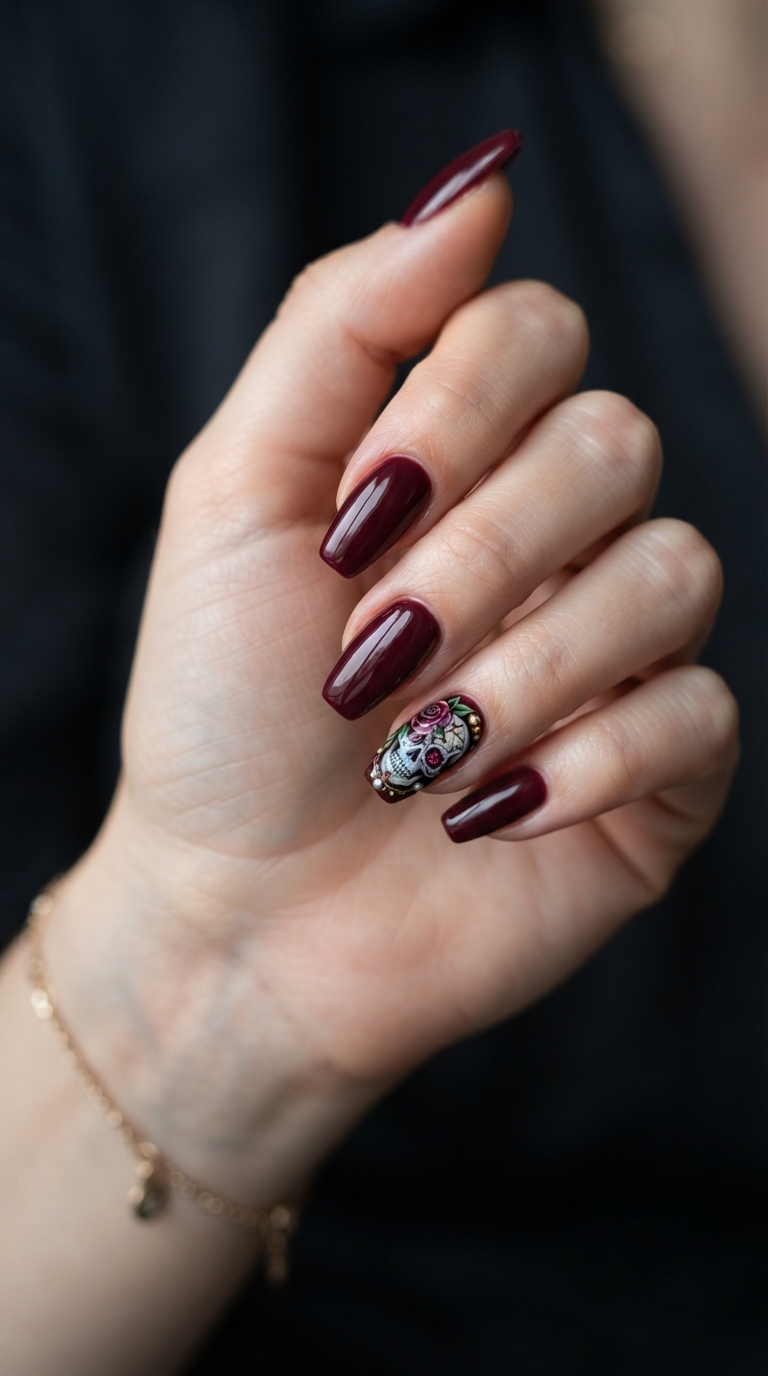
A detailed, hand-painted composition combining a small rose and a stylized skull on one accent nail requires genuine illustrative skill, balancing two distinct shapes within the limited space of a single nail without either element reading as cramped or unclear. Best for: Anyone wanting a genuinely artistic, gothic-inspired centerpiece nail.
Style 14: Dripping Wax Candle Effect
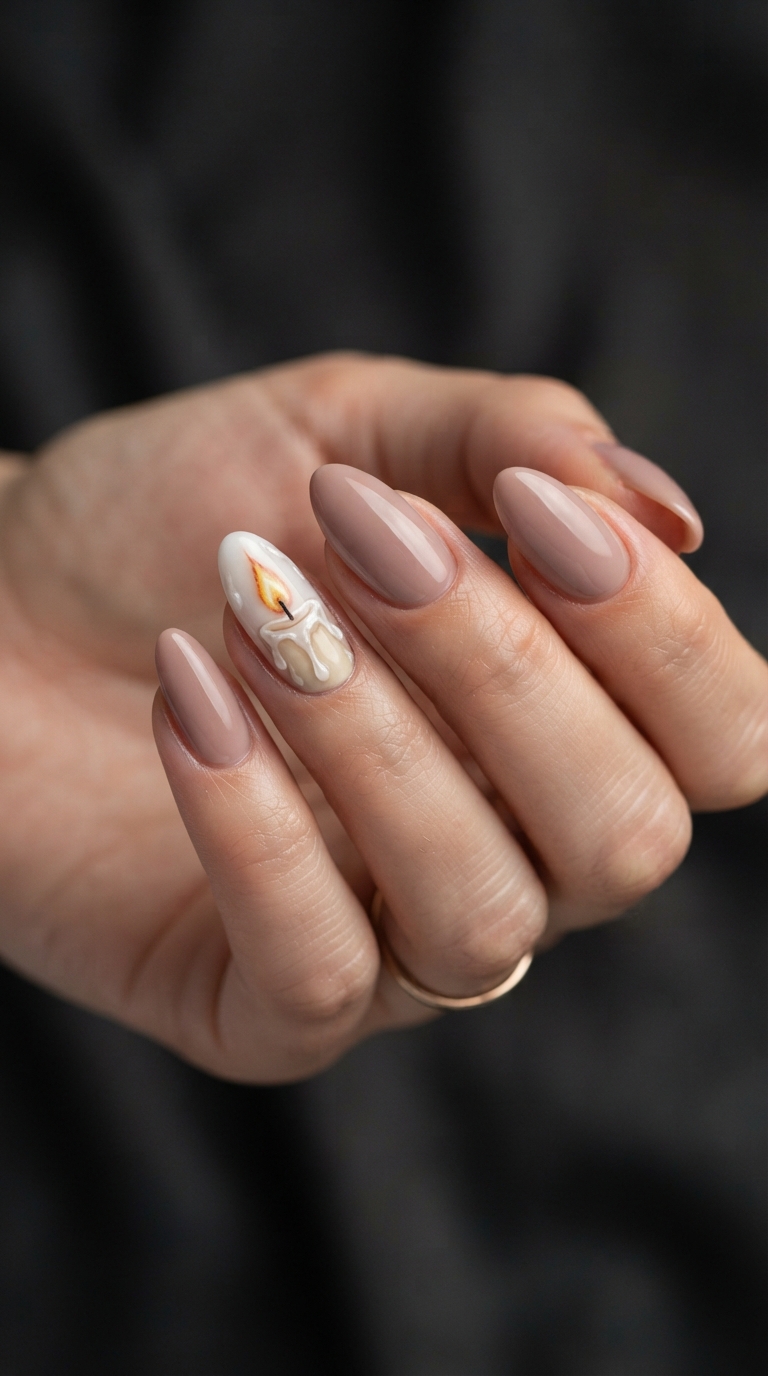
Thin, irregular white or cream drip shapes trailing down a nail painted to resemble a lit candle, with a small flame detail at the tip, recreate melting wax through careful, controlled linework that has to look intentionally uneven rather than sloppy. Best for: Anyone wanting a specific, less common Halloween-adjacent image.
Style 15: Layered Full-Set Spider Web With Dimensional Center
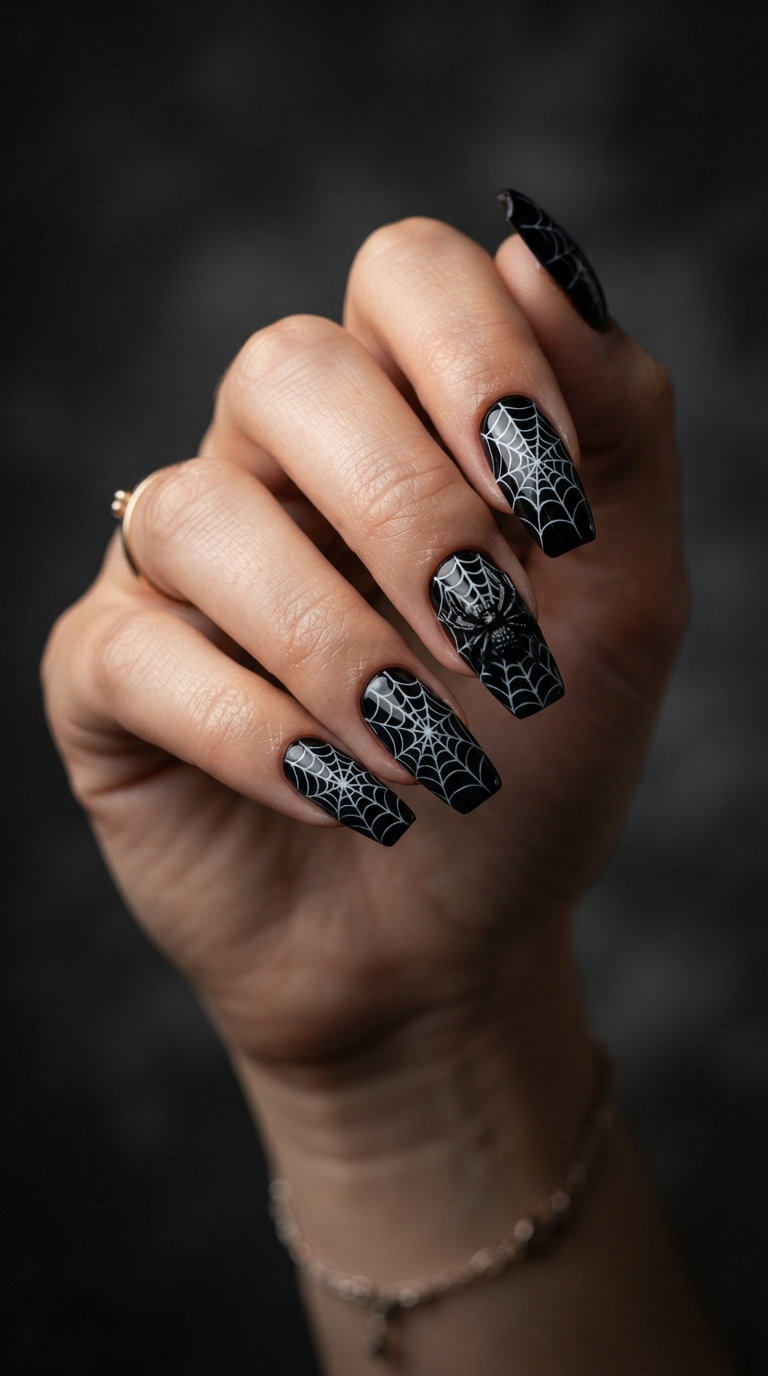
A full set where every nail carries a fine white web pattern over glossy black, with one nail featuring a raised 3D acrylic spider positioned at the web’s center, combines the negative-space and 3D techniques from earlier entries into one cohesive, full-hand statement. Best for: Anyone wanting a fully committed, technically ambitious full set.
Style 16: Smoky Ombré Eye With Painted Detail

A softly blended grey-to-black gradient base with a small, detailed painted eye (iris and pupil) positioned off-center creates an eerie, watchful effect that relies on both smooth color blending and precise small-scale painting. Best for: Anyone wanting something genuinely unsettling rather than playfully spooky.
Style 17: Foil Transfer Bat Pattern
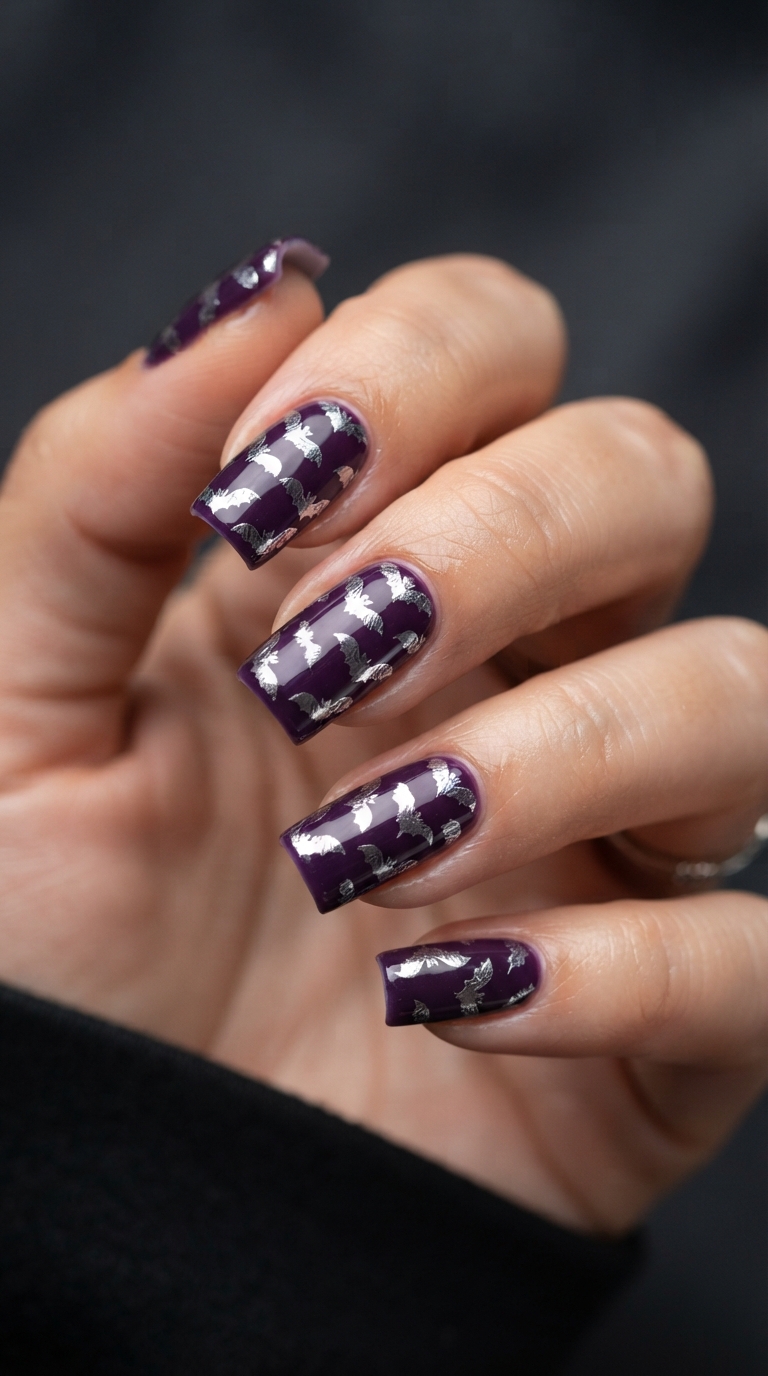
Using metallic foil transfer technique — pressing thin metallic foil onto a tacky adhesive layer in a bat-shaped pattern — creates a repeated metallic bat print with a texture and shine that hand-painting can’t replicate. This technique requires practice to apply foil cleanly without tearing or bubbling. Best for: Anyone wanting a repeated metallic pattern rather than isolated painted motifs.
Style 18: Dimensional Cobweb With Acrylic Powder Texture
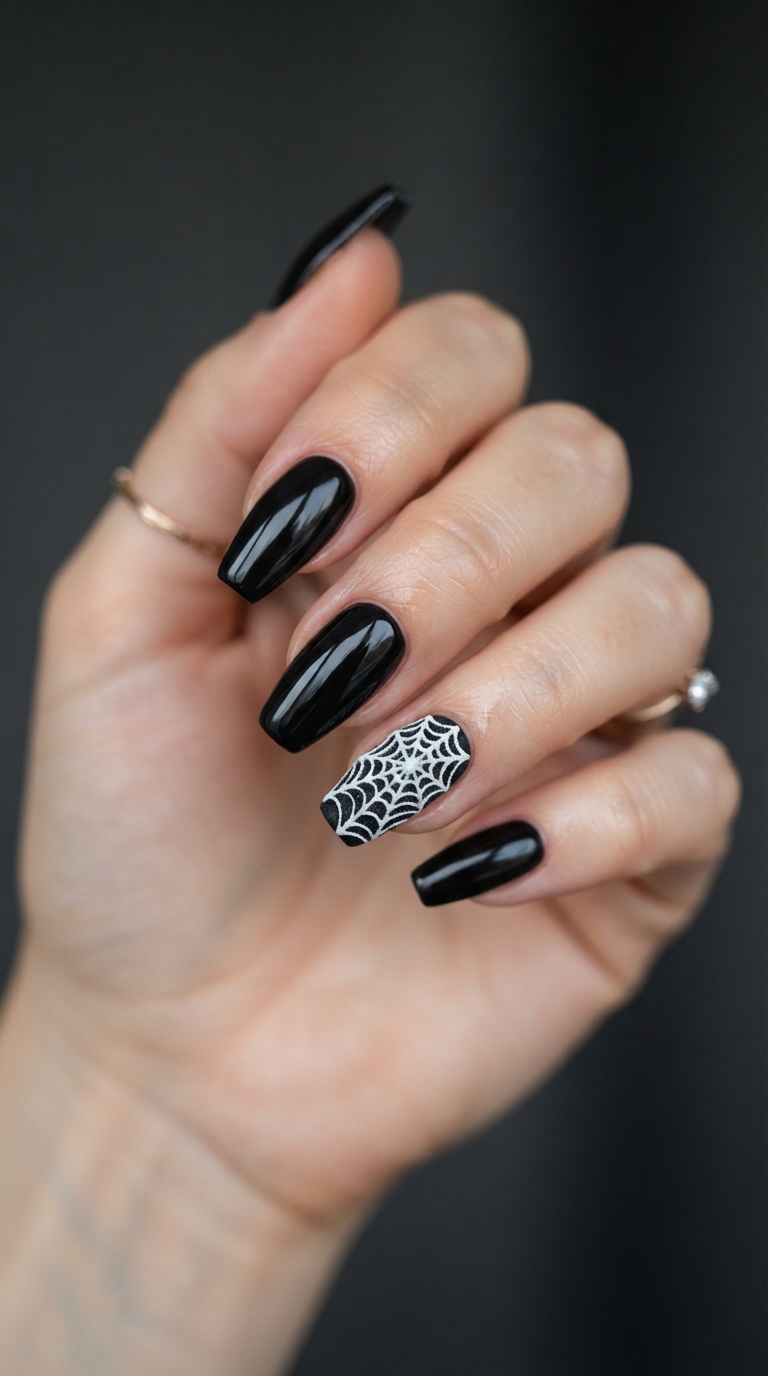
Rather than a flat painted web, fine white acrylic powder is used to build slightly raised, textured web lines that catch light differently than a flat painted equivalent, adding a subtle tactile quality to a familiar motif. Best for: Anyone wanting a web design with genuine surface texture.
Style 19: Deep Purple Galaxy Effect With Fine Star Detail
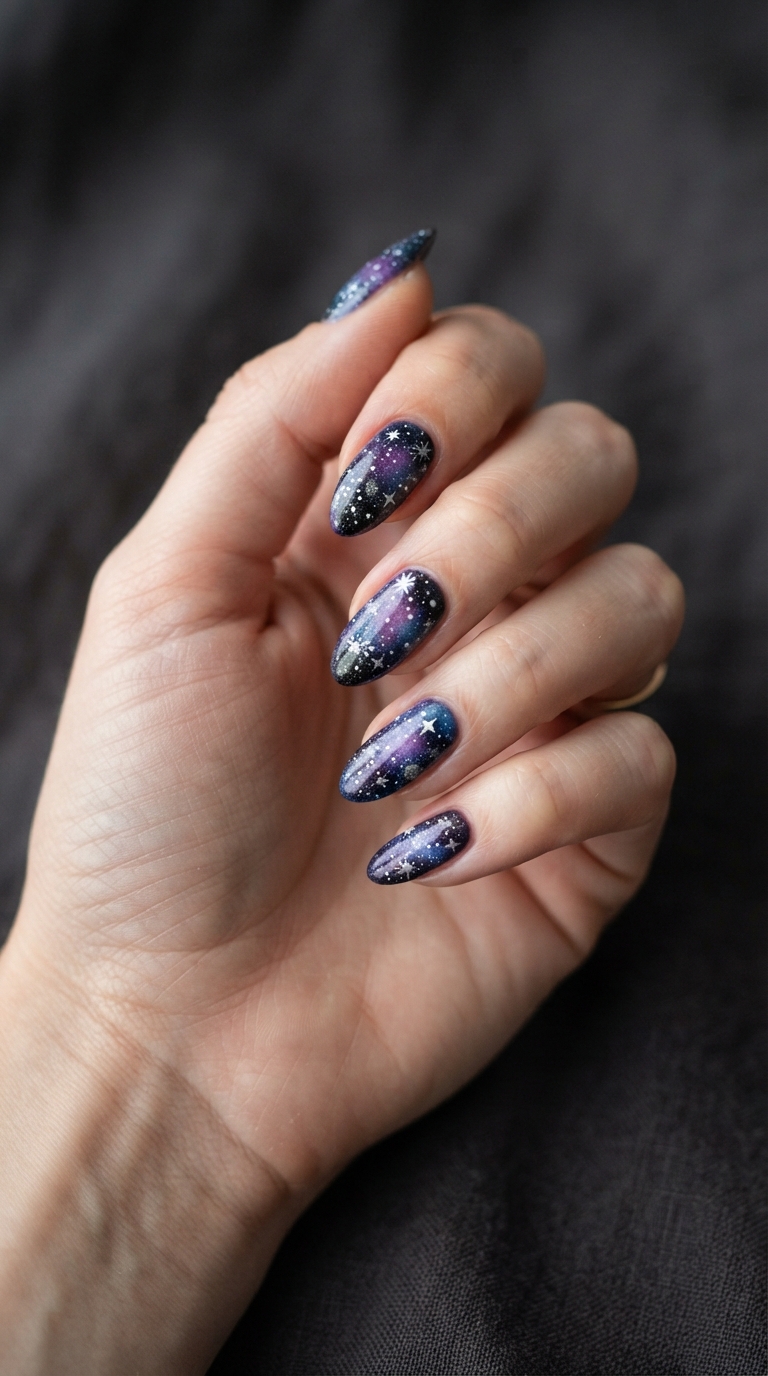
A sponged blend of deep purple, black, and navy, finished with tiny painted or dotted stars in white and silver, recreates a night-sky effect that leans mystical rather than explicitly Halloween-themed, while still fitting the season’s darker color palette. Best for: Anyone wanting a Halloween-adjacent design without literal imagery at all.
Style 20: Raised Acrylic Pumpkin With Carved Face Detail
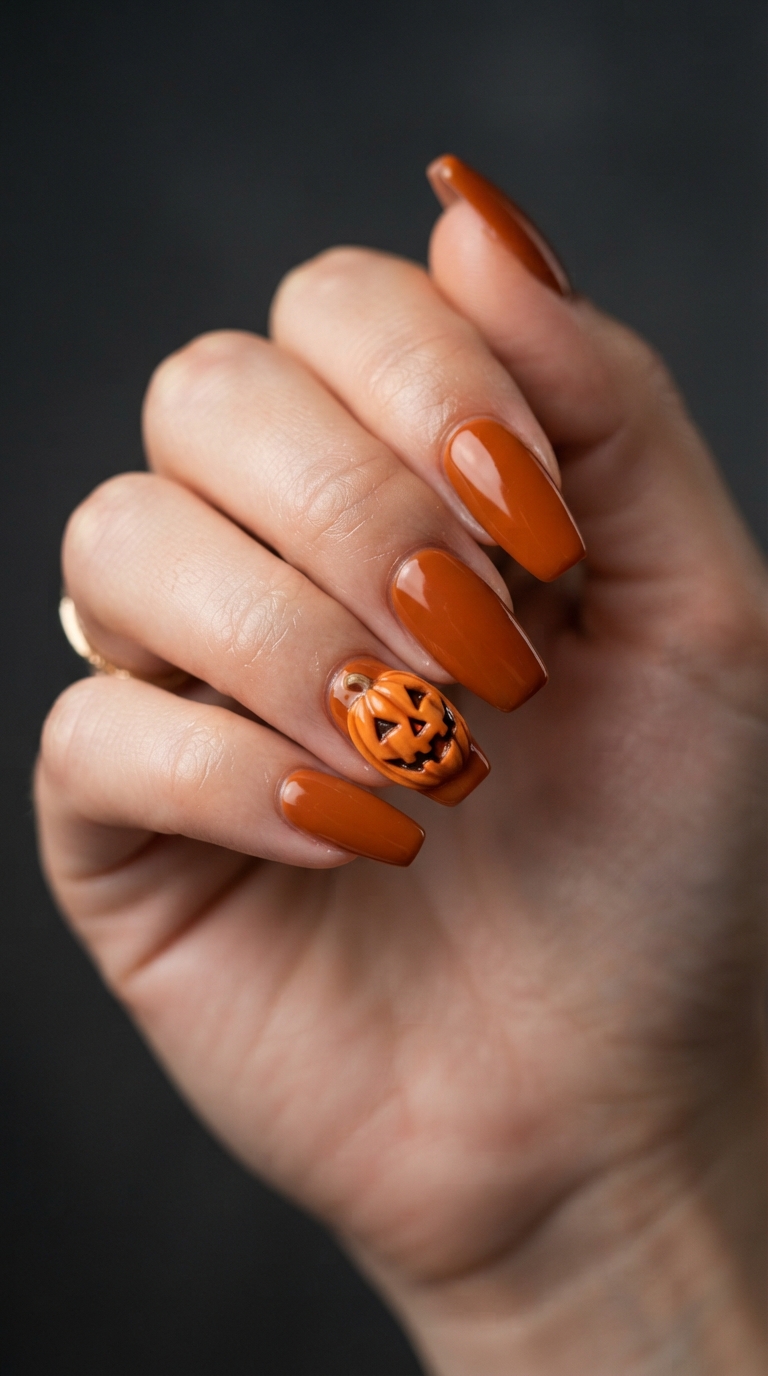
Sculpting a small, raised pumpkin shape directly from orange-tinted acrylic powder, then carving a simple jack-o’-lantern face into the still-workable acrylic before it fully hardens, creates genuine dimensional relief rather than a flat painted image. Best for: Anyone wanting the most sculpturally ambitious pumpkin design on this list.
Style 21: Full Mixed-Technique Statement Set
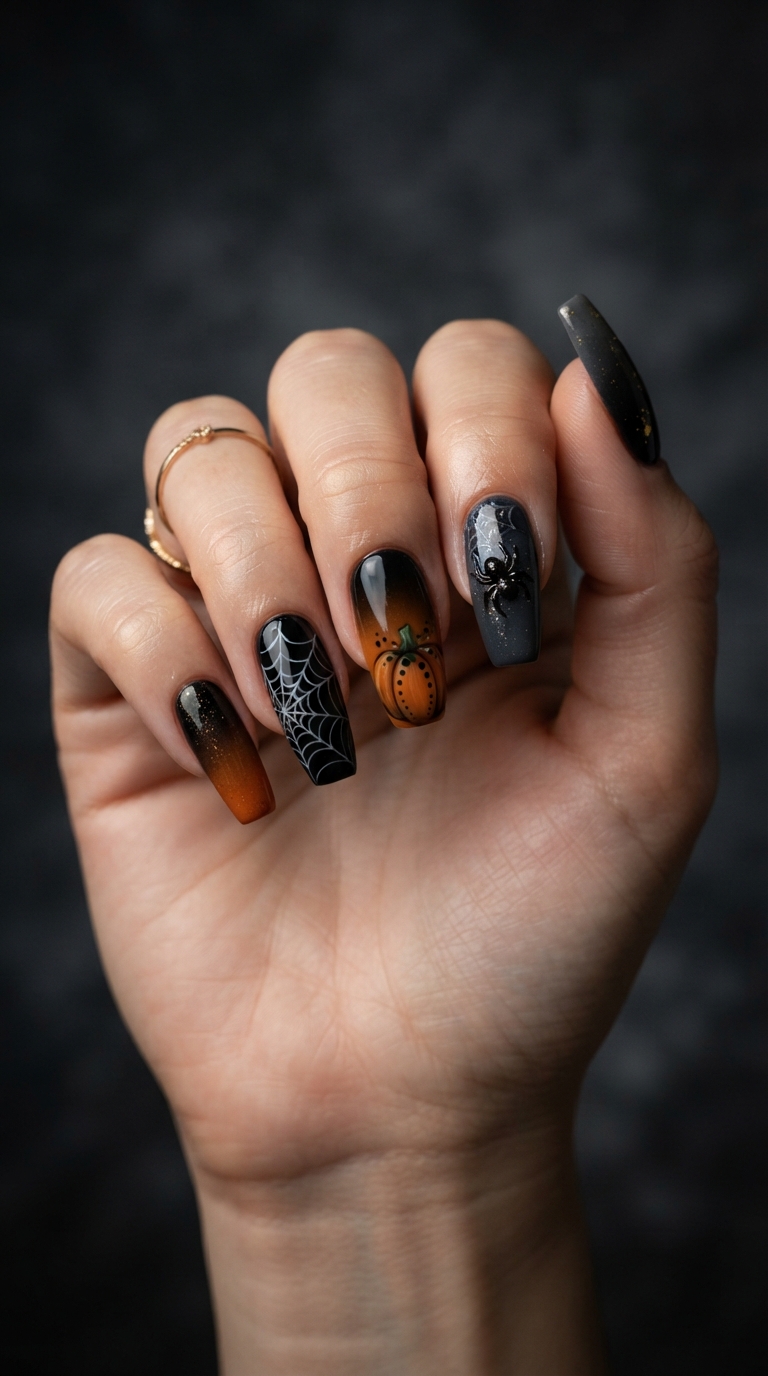
Combining several techniques from this list across one hand — a wet-on-wet pumpkin on the thumb, a negative space web on the index, a 3D spider accent on the ring finger, and a smooth ombré on the remaining nails — creates a genuinely varied, technically ambitious statement set that showcases a technician’s full range. Best for: Anyone wanting a portfolio-level Halloween set rather than a repeated single technique.
How to Ask Your Nail Technician for These Looks
Several of these techniques — 3D sculpting, wet-on-wet blending, negative space precision — require genuine specialized skill, so it’s worth asking directly whether your technician has experience with the specific technique before booking, especially for a first-time visit to a new salon. Bring a reference photo and be upfront that you understand the design will take longer than a standard manicure; most of these techniques genuinely add 30 minutes to over an hour depending on complexity.
Maintaining Detailed Nail Art
Dimensional and 3D elements are more prone to snagging than flat designs, so it’s worth being mindful around fabric, hair, and tight spaces in the days immediately following application. A fresh topcoat sealing any raised or textured elements every week to ten days helps protect the detail work through a full fill cycle.
Closing Thoughts
Halloween nail art at this level isn’t about doing more for the sake of it — it’s about the specific techniques that create genuine dimension, texture, and visual depth a flat painted motif can’t achieve. Whether you land on one ambitious accent nail or a full mixed-technique set, the goal is nail art that looks like it took actual skill to make, because it did.
Save this guide, pick the techniques that excite you most, and bring the specific language to your next appointment.