

How to Cut Bangs at Home: 10 Methods and Safety Tips
Cutting bangs at home looks simple until the scissors are actually in your hand. Unlike trimming the ends of long hair, where a small uneven section can often disappear into the overall shape, bangs sit directly around the face. A quarter-inch difference can change how much forehead is visible, where the eyes are framed, whether the fringe flips outward, and how the entire haircut appears from the front. That is why bangs are one of the easiest areas to overcut and one of the hardest to hide while they grow back.
The good news is that trimming bangs at home can be manageable when the goal is modest. Refreshing an existing fringe, shortening curtain bangs slightly, removing a few millimeters from wispy ends, or reshaping a side fringe can be much more predictable than attempting to create a completely new fringe from long hair without any previous shape to follow.
The most important principle is simple: cut less than you think you need to. Hair behaves differently when it is wet, stretched, curled, freshly blow-dried, oily, or sitting in its natural texture. Straight hair may spring up slightly once tension is released. Wavy and curly hair can shrink significantly. Bangs styled under with a round brush can appear shorter than the same hair sitting flat. This is why a fringe that looks too long during the first pass can suddenly become much shorter after it is washed and allowed to settle.
At-home bang cutting is also not one universal technique. Blunt bangs need a different approach from curtain bangs. Curly fringe should not be treated like straight hair. Side-swept bangs depend heavily on direction and angle, while wispy bangs are created through controlled reduction rather than one straight cut across the entire section. The safest home approach therefore depends on three things: the bang style you already have or want, your natural hair texture, and how comfortable you are making small adjustments. This guide covers ten practical methods, along with the safety principles that matter before the first snip.
Before You Cut Anything: Set Up the Right Tools and Conditions
The quality of the result depends partly on the cutting technique, but it also depends heavily on the tools and the condition of the hair. Use sharp haircutting scissors rather than kitchen, craft, fabric, or nail scissors. Hair shears are designed to produce a cleaner cut through hair fibers, while dull or inappropriate blades can push the hair away as they close, create uneven results, or leave the ends looking rough.
Work in strong, even lighting with a mirror positioned directly in front of you. Avoid bending toward the mirror while you cut because changing your head position can change how the bangs fall. Stand or sit upright, look forward naturally, and allow the hair to hang where it normally does.
Your hair should also be behaving as close to its normal state as possible. For many bang styles, especially straight and wavy fringe, cutting mostly dry hair gives you a clearer idea of the finished length. Curly hair should generally be assessed in its natural dry curl pattern because shrinkage can be substantial. You will also need sectioning clips and a fine-tooth or tail comb. Most importantly, clip the rest of your hair completely away from the bang section before you begin. Accidentally pulling longer side pieces into the fringe is one of the fastest ways to create a section much wider than you intended.
Basic At-Home Bang Cutting Kit
| Tool | Why It Helps | Avoid |
|---|---|---|
| Haircutting scissors | Clean, controlled cutting | Kitchen/fabric scissors |
| Tail comb | Precise sectioning | Pulling random hair forward |
| Hair clips | Keeps non-bang hair away | Leaving side sections loose |
| Large mirror | Lets you assess symmetry | Cutting while leaning forward |
| Hand mirror | Useful for side-angle checks | Constantly twisting your head |
| Good lighting | Makes length and density easier to judge | Dim bathroom lighting |
Safety rule: If you cannot clearly see the cutting line, stop and reposition rather than guessing.
1. The Maintenance Trim — Safest for Bangs That Already Have a Shape
If your bangs were professionally cut and simply need a small refresh, the safest method is to preserve the existing shape instead of redesigning it. Begin by allowing the fringe to fall naturally. Separate the exact section that already belongs to the bangs and clip everything else securely away. Avoid widening the section just because neighboring hairs seem to fall forward; those pieces may belong to the sides of the haircut rather than the fringe itself.
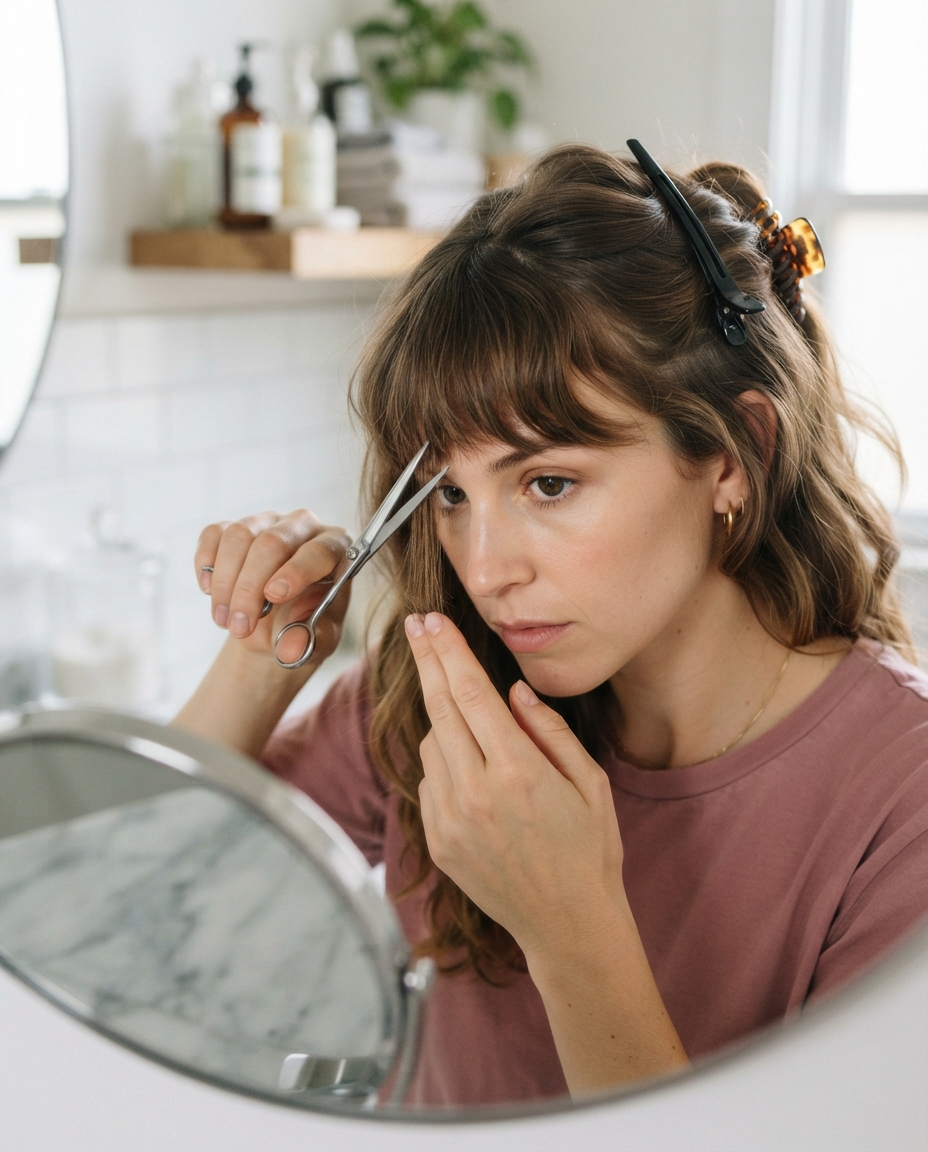
Comb the bangs gently, but do not stretch them downward with strong tension. Holding hair taut can make it appear longer than it naturally sits, which often results in cutting more than intended. Instead of making one straight horizontal cut, work in small sections and remove only the ends that clearly extend beyond the existing line. For soft fringe, hold the scissors vertically or at a slight angle and make tiny point cuts into the ends. This preserves movement and reduces the risk of creating a hard shelf across the forehead.
If the existing bangs are blunt, you can still work gradually across the line rather than closing the scissors through the entire section at once. Check after every few snips. The goal of a maintenance trim is not to make the bangs look dramatically different. It is to make them look like the same haircut, only fresher.
Best for: Existing bangs that have grown slightly too long but still retain their basic shape.
2. The Blunt Bang Method — Build the Line Slowly Instead of Cutting Straight Across
Blunt bangs look simple because the finished result creates a clear horizontal line, but they are among the easiest styles to make uneven at home. The mistake is usually trying to achieve the entire line with one large cut. Instead, divide the bang section into several narrow subsections. Begin in the center, where the desired length is easiest to judge, and remove a very small amount. Allow the hair to fall naturally, then use that center section as a visual reference as you move outward.
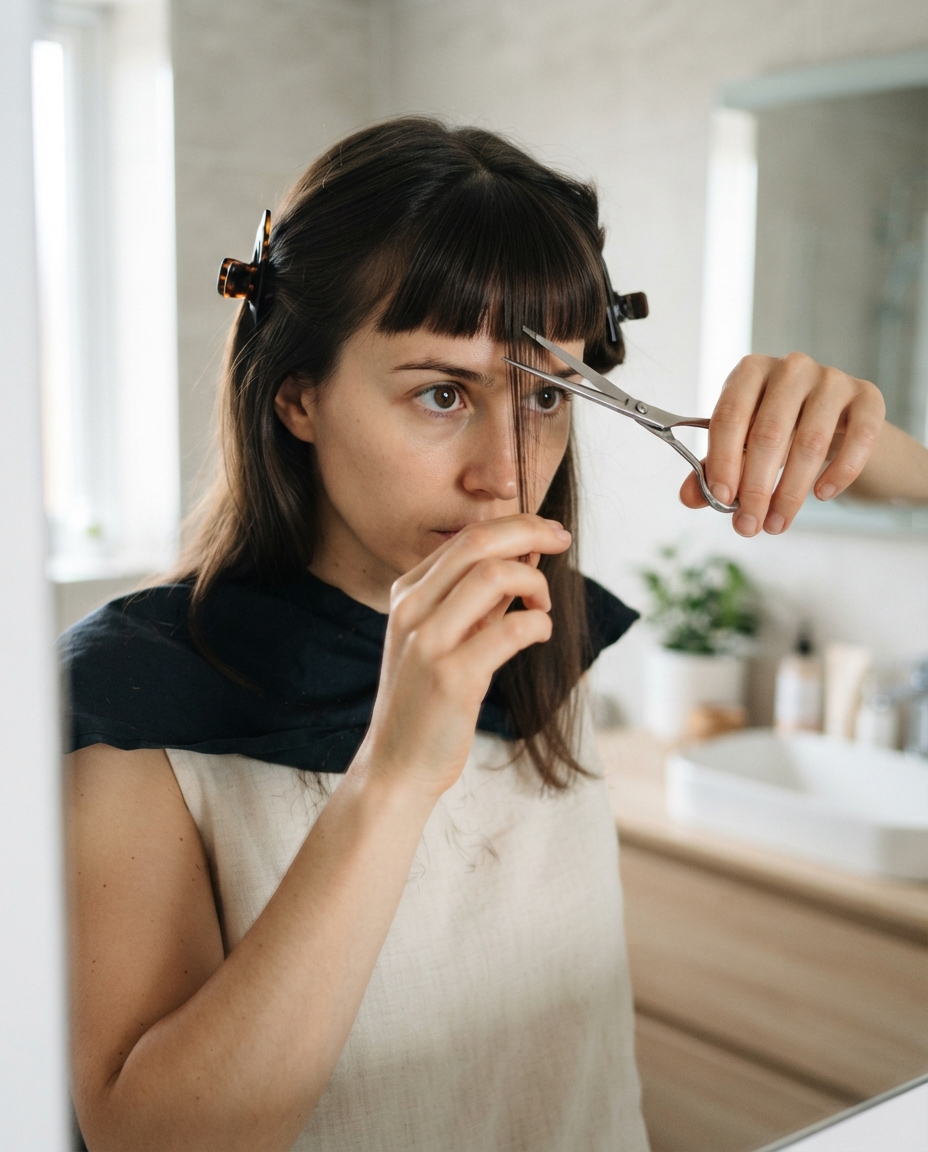
Do not pull the side sections toward the center. This changes their natural fall and can create shorter corners once the hair is released. Each section should be cut close to where it naturally sits. For a softer blunt finish, use very shallow point cutting after the overall length has been established. The goal is not to turn the fringe into wispy bangs, but to prevent the bottom edge from appearing unusually heavy or jagged.
Remember that straight-across bangs often appear shorter once they are styled, especially if they bend inward under the forehead. If you want the finished bangs to sit near the eyebrows, stop longer than that during the first pass, style them normally, and reassess before cutting more.
Blunt Bang Length Check
| Desired Look | Safer First-Pass Strategy |
|---|---|
| Eyebrow-skimming | Stop slightly below the brows first |
| Above-brow | Establish eyebrow length first, then shorten gradually |
| Longer blunt fringe | Keep near upper lashes/eyebrows and refine |
| Heavy full fringe | Keep section width unchanged; avoid pulling extra hair forward |
Best for: Straight or slightly wavy hair with an already established blunt fringe section.
3. Curtain Bangs — Keep the Center Shorter and the Outer Edges Longer
Curtain bangs work because they create a gradual transition rather than one uniform length. The shortest pieces typically sit closer to the center of the face, while the outer pieces lengthen toward the cheekbones, jaw, or longer face-framing layers depending on the style. Begin with the existing curtain-bang section rather than pulling a large triangle of new hair forward. Part the fringe roughly in the center and work on one side at a time.
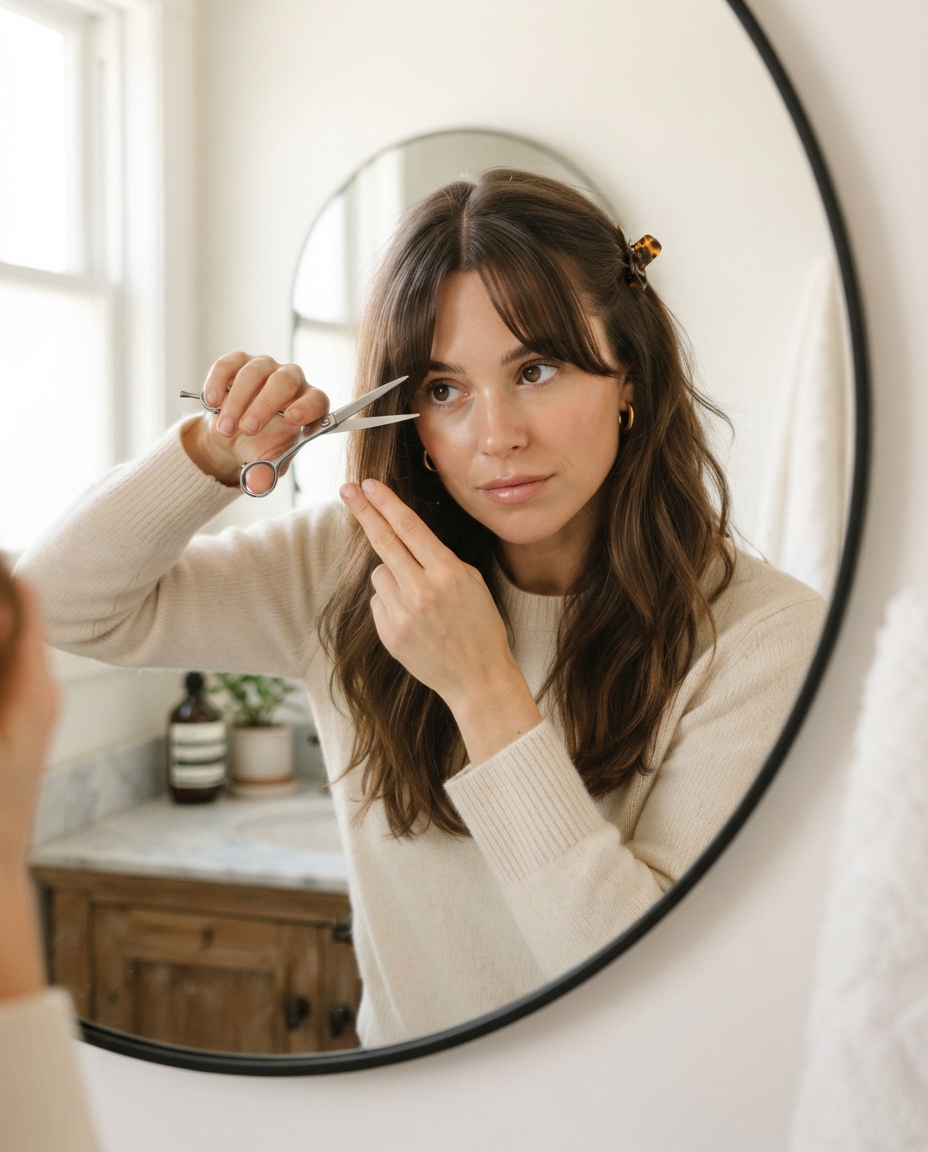
The safest approach is to determine the shortest point first. For many curtain styles, this may fall around the eyebrow, upper cheek, or somewhere between those areas depending on how long you want the fringe. The important part is not the exact measurement but the gradual length increase toward the outside. Hold the section lightly and cut at an angle that follows the intended direction. Do not aggressively twist the section or pull it across the face because excessive redirection can create unexpected short pieces once the hair returns to its natural position.
After cutting one side, release it, style it lightly away from the face, and compare before matching the other side. Curtain bangs do not need mathematical symmetry. Natural hair growth, parting, cowlicks, and facial asymmetry can make one side fall differently, so visual balance matters more than identical measured lengths.
Best for: Longer bangs, center parts, layered haircuts, and people who want a softer grow-out than blunt fringe.
4. Wispy Bangs — Reduce Density Instead of Cutting a Thick Fringe
Wispy bangs depend on controlled sparseness. The biggest risk is accidentally turning them into full bangs by pulling too much hair into the section. Start with a narrow, shallow fringe section. If you already have wispy bangs, use the exact established area. If you are creating them for the first time, be extremely conservative about how far back into the hairline you section.
The more hair you include, the heavier the fringe becomes. Rather than cutting every strand to the same length, work with small irregular subsections and use tiny point cuts. Some pieces can remain slightly longer than others so the forehead remains partially visible through the fringe.
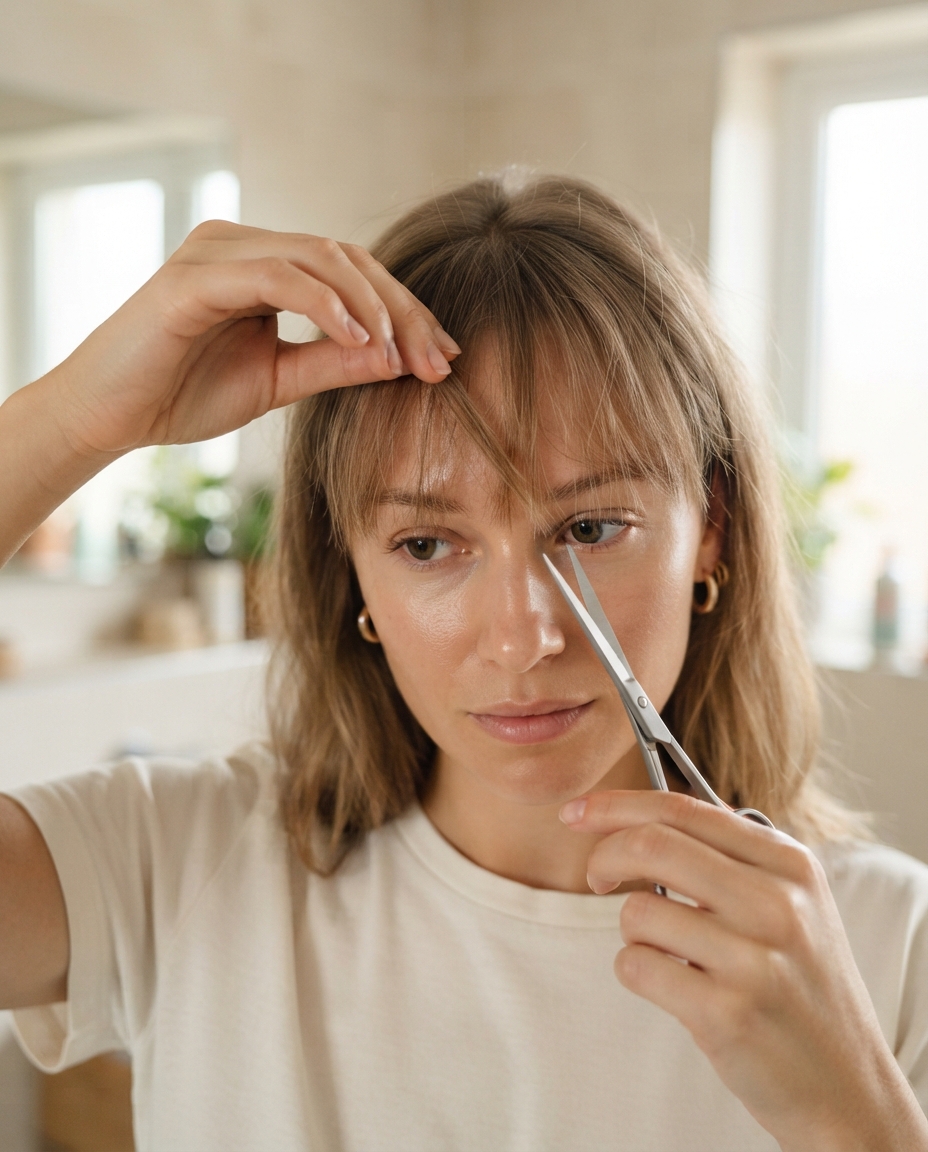
Do not attempt to create wispiness by randomly thinning huge amounts of hair with scissors near the roots. That can produce short hairs that stick upward and create unpredictable regrowth. Wispiness should come from the amount of hair in the fringe and subtle variation at the ends, not uncontrolled thinning. Check the bangs after each pass by shaking them out and letting them resettle. The final result should look light before styling. If it only looks wispy after aggressive separation with your fingers, the section may still be too dense.
Best for: Fine to medium hair, light fringe, soft Korean-inspired or airy bang styles, and anyone who dislikes heavy forehead coverage.
5. Side-Swept Bangs — Cut in the Direction the Hair Actually Falls
Side-swept bangs are shaped by direction as much as length. If the hair naturally sweeps from left to right, cutting it while forcing it straight down can create a fringe that looks uneven once it returns to the side. Begin by placing the hair in the part and direction you normally wear it. Let the section fall across the forehead naturally, then identify the shortest point near the inner portion and the longer endpoint near the temple or cheek.

Work gradually along that diagonal line. A common mistake is over-directing the hair by pulling the entire section far across the opposite side of the face. While certain salon techniques intentionally use over-direction, it is easy to misjudge at home and create a much steeper angle than expected. For a beginner, following the actual resting position of the fringe is more predictable.
Use point cutting at the ends if you want a soft finish. Side-swept bangs usually look better with slight movement rather than an extremely solid diagonal edge. The final check should be done with the bangs styled exactly as you normally wear them.
Best for: Side parts, longer fringe, soft face framing, and anyone growing out shorter bangs.
6. Bottleneck Bangs — Keep the Center Narrow and Blend Into Longer Face-Framing Pieces
Bottleneck bangs combine a shorter central fringe with longer curved pieces that open around the face. They are similar to curtain bangs, but the center usually has more visible fringe rather than immediately splitting into two sides. Think of the shape as a narrow opening at the center that gradually widens and lengthens as the hair moves outward. Begin with the center section and establish a conservative length. Depending on the look, the shortest pieces may sit around the eyebrow area or slightly lower.

Then work outward in small sections, allowing each new section to remain longer than the one before it. The outermost pieces should blend into the existing face-framing layers rather than stopping abruptly. This style is especially easy to overcut because shortening the outer pieces too much removes the “bottleneck” transition and creates a more conventional full fringe. Do not attempt to perfect the blend in one pass. Style the bangs, see where the longer pieces curve around the cheeks, and only then refine any disconnected ends.
Best for: Layered haircuts, medium to long hair, people who like curtain bangs but want slightly more forehead coverage.
7. Curly Bangs — Cut Curl by Curl and Respect Shrinkage
Curly bangs need a completely different mindset from straight fringe. The most important rule is to cut them in the curl pattern they will actually be worn. A wet curl can stretch significantly longer than it appears when dry. Cutting wet curly bangs to the desired finished length can therefore result in fringe that springs much higher once the hair dries.
For a home trim, allow the curls to dry in their normal pattern with your usual styling products. Do not stretch the curl downward. Work curl by curl. Identify individual curls that hang longer than the overall fringe shape, then trim only the end of those curls. Some curls naturally shrink more than others, so using one horizontal line across the entire fringe can create an uneven result once the pattern recoils.
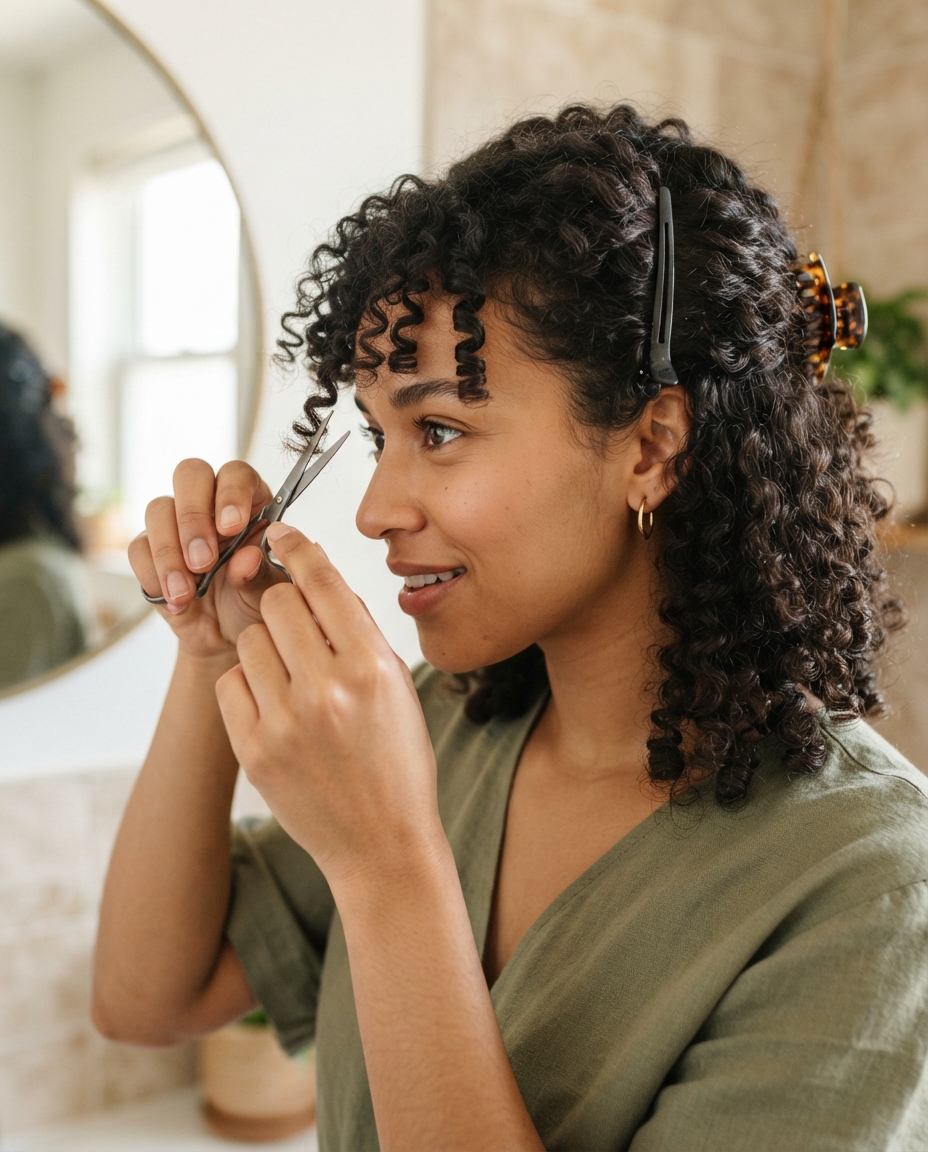
If you are creating curly bangs from long hair rather than maintaining an existing shape, the risk is much higher. Curl patterns can behave unpredictably around the hairline, and a stylist experienced in curly cutting may be the safer choice. For maintenance, however, small curl-by-curl trimming can preserve the existing silhouette without disrupting the pattern.
Curly Bang Safety Guide
| Rule | Why It Matters |
|---|---|
| Cut dry | Shows true finished curl length |
| Do not stretch | Prevents cutting too short |
| Work one curl at a time | Respects different shrinkage |
| Remove very little | Curls can spring higher after cutting |
| Check after movement | Curls resettle after handling |
Best for: Naturally wavy, curly, or coily fringe that already has an established bang shape.
8. Long Face-Framing Fringe — The Lowest-Commitment Way to Experiment With Bangs
If you want the feeling of bangs without committing to short fringe, long face-framing pieces are one of the safer options. These pieces typically begin somewhere around the cheekbones, nose, or jaw and blend gradually into the longer haircut. Because the shortest point is much farther from the eyebrows, small cutting errors are less dramatic, and the style grows out more easily.

Begin with a very small front section on each side of the part. Decide where you want the shortest face-framing piece to fall, but cut slightly longer than that at first. Work downward toward the existing hair length so the transition remains gradual. Avoid pulling a large portion of hair from behind the temples into the frame. Too much hair creates bulky short layers around the face and can make tying the hair back more difficult.
After the initial cut, style the sections away from the face and assess the shape from the front and side. This method works particularly well for people who are unsure whether bangs suit them because it creates movement without forcing them into a short fringe.
Best for: Bang beginners, long hair, layered haircuts, and anyone who wants a low-risk change.
9. Micro Bangs — High Commitment, Tiny Margin for Error
Micro bangs sit noticeably above the eyebrows and create a strong, graphic look. They are also one of the least forgiving styles to cut at home. Because the fringe is intentionally short, there is almost no room to correct an overcut section without making the entire fringe even shorter. For that reason, anyone creating micro bangs from long hair for the first time should strongly consider having the initial shape established professionally.
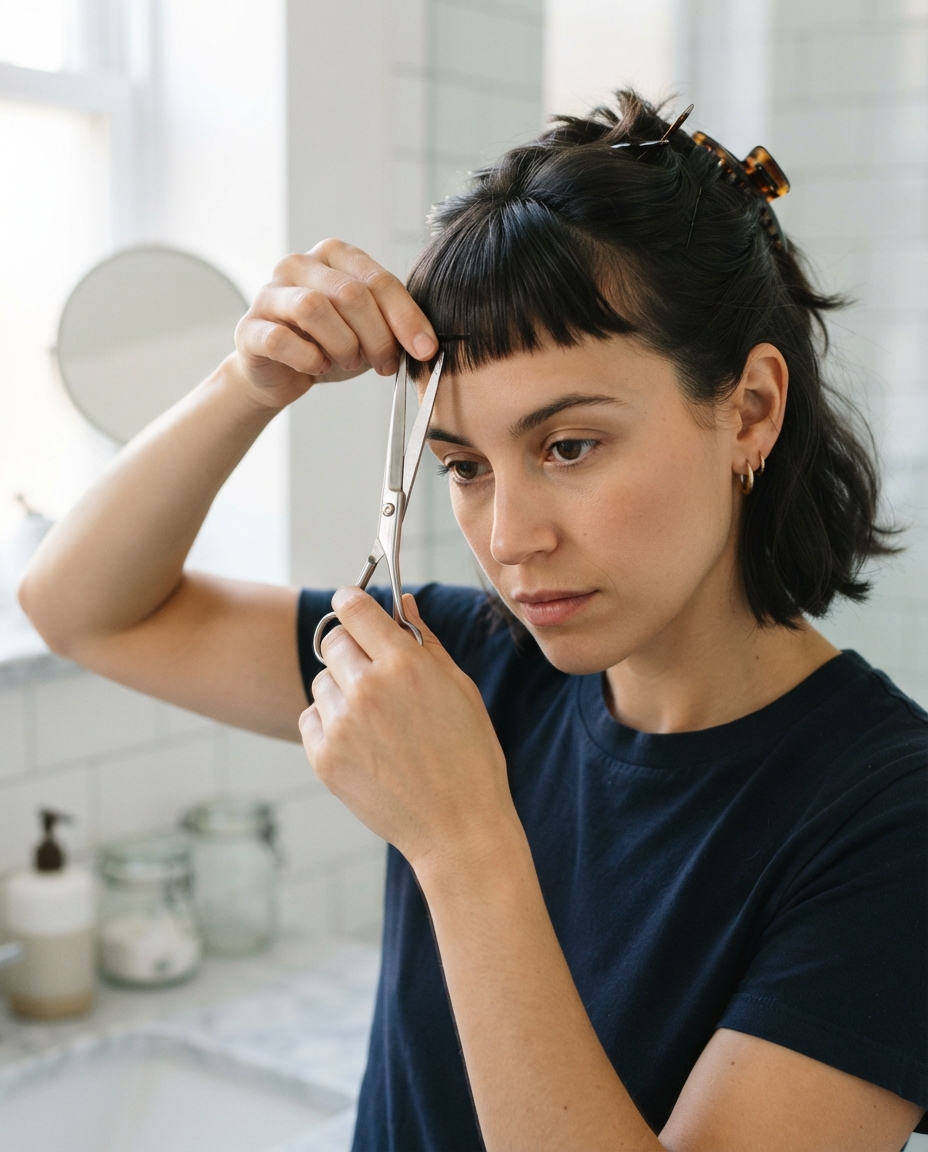
If you already have micro bangs and are simply maintaining them, work extremely slowly. Cut dry hair with the fringe sitting exactly as you wear it. Remove only a few millimeters at a time and keep the scissors controlled near the ends rather than cutting deep into the section. Cowlicks and strong growth patterns matter enormously at this length. Hair that appears straight when longer may lift dramatically once it is shortened above the brows.
A maintenance trim should therefore follow the existing shape rather than attempt to redesign the fringe.
Best for: Existing micro bangs that need a minor trim.
Not ideal for: A first-ever home bang haircut.
10. Point Cutting for Softening — Refine the Ends Without Taking Off Much Length
Point cutting is less of a bang style and more of a finishing method. Instead of holding the scissors horizontally and creating a solid edge, turn the scissors so the tips enter the ends of the hair vertically or on a slight angle. Make tiny, shallow snips into the perimeter. This breaks up a heavy line and can make blunt, curtain, wispy, or side-swept bangs sit more naturally.
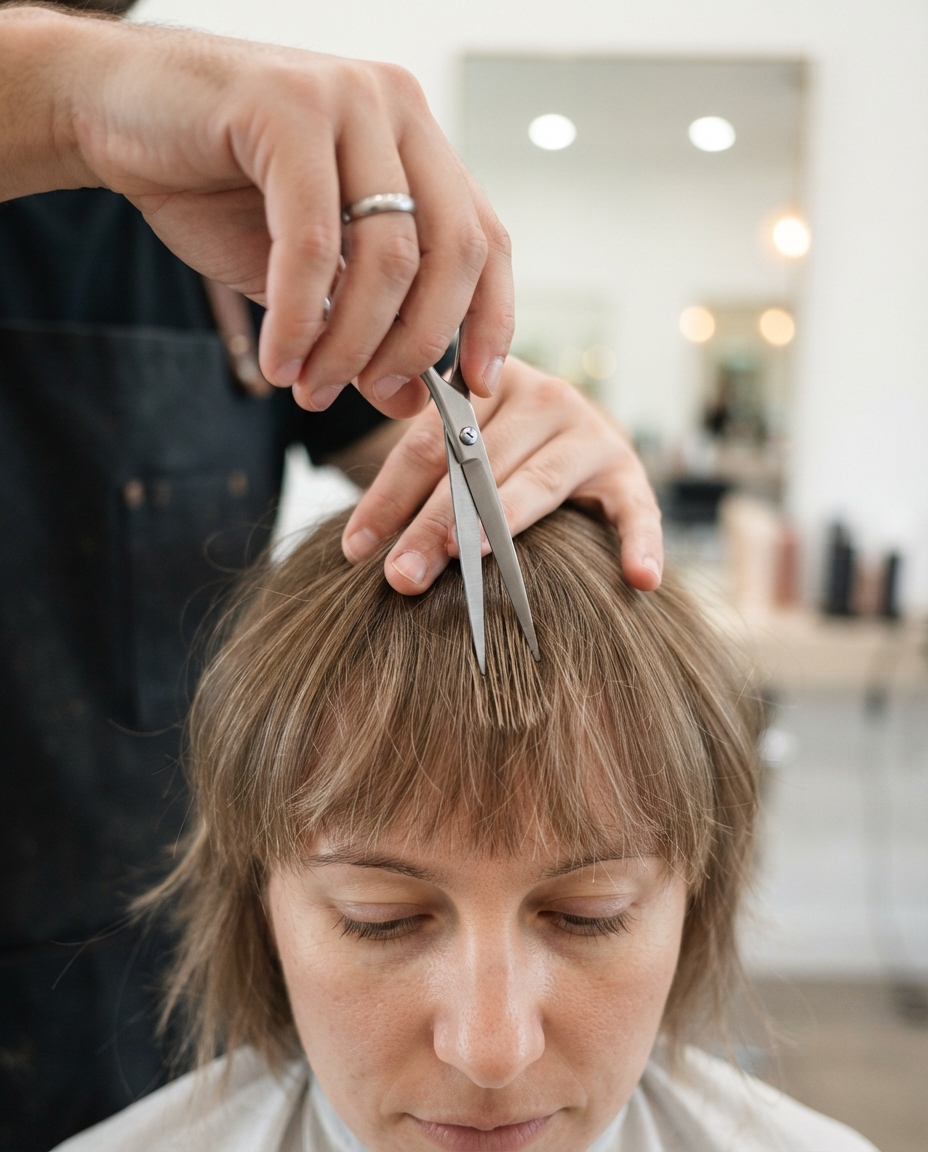
The word “shallow” matters. Deep point cutting removes much more hair and can create uneven short pieces. The scissors should only enter the very ends if your goal is subtle softness. Work slowly across the fringe and stop frequently to shake the hair loose. Point cutting is particularly useful after you have established the overall length but feel the bangs look too rigid. It should not be used as a way to rescue a fringe that is already much too short.
This technique is also safer than random thinning because you can see exactly where each small amount of hair is being removed.
Best for: Softening blunt edges, refining curtain bangs, removing heaviness from an existing fringe.
Which Bang-Cutting Method Fits Which Style?
Different bangs need different cutting logic. Trying to use the same horizontal technique on every fringe style is one of the fastest ways to create a result that does not match the intended shape.
| Bang Style | Main Cutting Principle | Risk Level at Home | Best for Beginners? |
|---|---|---|---|
| Existing bang trim | Follow existing shape | Low-moderate | Yes |
| Blunt bangs | Build line in small sections | Moderate | With caution |
| Curtain bangs | Short center, longer sides | Moderate | Usually |
| Wispy bangs | Low density + point cutting | Moderate | Usually |
| Side-swept bangs | Follow natural direction | Moderate | Usually |
| Bottleneck bangs | Gradual center-to-side length | Moderate-high | Some experience helpful |
| Curly bangs | Cut dry, curl by curl | Moderate | Maintenance only |
| Long face framing | Keep shortest point long | Low-moderate | Yes |
| Micro bangs | Extremely short, precise line | High | Not recommended for first cut |
| Point cutting | Soften ends only | Low when shallow | Yes |
The Safest Way to Section Bangs
Sectioning determines how thick and wide the fringe becomes. This is why it matters just as much as the actual cutting. If you already have bangs, use the established section. Do not casually add new hair from farther back on the head simply because you want the fringe to feel thicker. If you are creating fringe from long hair, the section is often triangular or slightly rounded depending on the haircut. The front point begins near the hairline, while the back of the section extends only as far as necessary to achieve the intended density.
A deeper section creates heavier bangs. A wider section creates bangs that extend farther toward the temples. Both changes are difficult to undo because the hair must grow back before it can rejoin the rest of the haircut. When unsure, start with less hair. You can always add a tiny amount later. You cannot put a freshly cut section back into the long layers.
Why Cutting Bangs Wet Is Riskier Than It Looks
Wet hair usually appears longer because water weighs the strands down and the hair may also be stretched during combing. Once the hair dries, that extra length disappears. For straight hair, the difference may be relatively small but still enough to move the fringe noticeably higher.
For wavy and curly hair, the difference can be dramatic. This is why dry cutting is particularly useful for home bang trims. It shows you the length in the condition closest to how you actually wear it. There are professional haircutting techniques that intentionally cut wet fringe, but the stylist is compensating for texture, tension, shrinkage, and styling behavior. At home, removing those variables makes the result more predictable. If your bangs naturally sit with a bend or curl, style them lightly into their normal position before deciding they are too long.
How Much Hair Should You Cut at a Time?
Very little. For a maintenance trim, think in millimeters rather than inches. Remove a tiny amount, release the hair, assess the length, and then decide whether another pass is needed.
The safest cutting sequence looks like this:
- Establish the section.
- Cut slightly longer than the desired result.
- Release all tension.
- Shake or comb the bangs naturally.
- Style lightly if needed.
- Check both sides.
- Remove another tiny amount only if necessary.
This process feels slow, but that is exactly why it works. A fringe can always become shorter. It cannot become longer again during the same haircut.
How to Handle Cowlicks Before Cutting Bangs
Cowlicks are one of the biggest reasons bangs behave differently from the reference photograph someone brings to a haircut. A strong growth pattern can push one section upward, separate the center, or force the fringe toward one side. Before cutting, wash or dampen and restyle the bangs if necessary so you can see the actual growth pattern clearly once dry.
Do not try to defeat a strong cowlick simply by cutting that section shorter. That can make the hair stand up even more dramatically. Instead, allow the natural growth pattern to influence the design. Someone with a strong center separation may find curtain bangs easier to maintain than heavy blunt fringe. A person whose hair naturally sweeps strongly to one side may find side-swept bangs more cooperative.
The most successful bangs work with the hair’s natural behavior rather than requiring a daily battle to force it into a completely different direction.
Common Bang-Cutting Mistakes and Why They Happen
Cutting Too Much in the First Pass
This is the classic mistake. The bangs appear long, so the first cut aims directly for the desired finished length. Once the hair is released and styled, it sits noticeably higher. Always stop long first.
Pulling the Hair Tight
Strong downward tension makes the section appear longer than it naturally is. When released, it springs upward.
Cutting the Whole Fringe in One Snip
This creates very little opportunity to correct angle, density, or symmetry as you work. Small sections give you more control.
Making the Section Too Wide
Pulling hair from too far toward the temples creates fringe that can look disconnected from the sides of the haircut.
Making the Section Too Deep
A very deep triangle creates much heavier bangs than expected.
Trying to Correct One Uneven Side Repeatedly
One side looks shorter, so you shorten the other. Then the first looks longer, so you cut it again.
This is how bangs gradually climb halfway up the forehead.
If the difference is tiny, leave it, style the fringe, and reassess later.
Cutting Curly Bangs While Stretched
The curls shrink after release and can become dramatically shorter.
When You Should Stop and See a Professional Stylist
At-home trimming is most predictable when you are maintaining an established shape. Creating a completely new fringe is more difficult because the stylist is deciding section width, density, length, face framing, growth pattern, and blending simultaneously.
Consider professional help if:
- You want micro bangs for the first time.
- You have a strong cowlick directly at the hairline.
- You have very curly or coily hair and do not know how much your fringe shrinks.
- You want to convert long hair into heavy blunt bangs.
- You are unsure how wide the bang section should be.
- Your current fringe is already significantly uneven.
- You are trying to correct a previous cutting mistake.
- Your desired bangs need to blend into a heavily layered haircut.
There is a major difference between trimming a quarter-inch from established curtain bangs and creating curtain bangs from waist-length hair. The second task involves haircut design, not just maintenance.
Bang Length and Maintenance Guide
Different fringe styles grow out differently and therefore need different levels of maintenance.
| Style | Maintenance Frequency | Grow-Out Difficulty | Everyday Styling |
|---|---|---|---|
| Blunt bangs | High | Moderate | Often needs daily adjustment |
| Micro bangs | High | High visual change as they grow | Moderate |
| Curtain bangs | Moderate | Easy | Often needs shaping/blow-drying |
| Wispy bangs | Moderate | Easy-moderate | Light styling |
| Side-swept bangs | Moderate-low | Easy | Directional styling |
| Bottleneck bangs | Moderate | Easy | Blowout or bend helpful |
| Curly bangs | Depends on shrinkage | Moderate | Curl routine important |
| Long face framing | Low | Very easy | Minimal |
A fringe that requires trimming every few weeks may still be worth it, but understanding the maintenance before cutting makes the decision much easier.
How to Check Symmetry Without Overcorrecting
Perfect symmetry is rarely necessary. Faces are not perfectly symmetrical, hairlines are not perfectly symmetrical, and growth patterns often differ from one side to the other. The goal is visual balance.
Look straight ahead in the mirror with your head level. Check where the shortest points fall relative to your brows, eyes, or cheekbones. Then turn slightly to each side and evaluate the transition into the longer hair. If one side differs by only a tiny amount, styling may correct more than another cut would.
Avoid trimming repeatedly while staring at a magnifying mirror. The closer you look, the larger small differences appear. Step back to normal conversational distance before deciding whether a correction is actually necessary.
How to Style Bangs Immediately After Cutting
Styling is part of the assessment. Blunt bangs may need light blow-drying from side to side before settling naturally. Curtain or bottleneck bangs often need to be directed away from the face with a round brush or rollers. Side bangs need to be styled in their natural sweeping direction.
Curly bangs should be allowed to return fully to their normal curl pattern before final length is judged. Do not immediately keep cutting just because newly trimmed fringe sits strangely after being held, combed, clipped, and manipulated for several minutes. Let it settle. A quick wash or light restyle may show that the apparent problem was temporary.
Safety Tips for Cutting Bangs at Home
Haircutting scissors are sharp, and bangs are cut very close to the eyes, forehead, and fingers. Keep the scissors pointed away from the face whenever possible. Work slowly and never cut while walking, turning suddenly, or trying to watch a phone tutorial at the same time. When point cutting, keep the snips shallow and controlled rather than pushing the blades deep toward the forehead. Children should not attempt self-cutting unsupervised, and anyone with limited hand control or vision should consider asking another person or a stylist for help.
Do not use razors, craft blades, or other improvised cutting tools around the face. If you feel nervous enough that your hand is shaking, stop. A slightly long fringe is infinitely easier to fix than an injury or a section cut far too short.
10 METHODS AT A GLANCE
| Method | Best Use | Difficulty | Biggest Risk |
|---|---|---|---|
| Maintenance trim | Existing bangs | Easy | Trimming too frequently |
| Blunt bangs | Straight/full fringe | Moderate | Cutting too short |
| Curtain bangs | Center-parted fringe | Moderate | Outer pieces too short |
| Wispy bangs | Light airy fringe | Moderate | Using too much hair |
| Side-swept bangs | Side-parted styles | Moderate | Wrong angle |
| Bottleneck bangs | Layered modern fringe | Moderate-high | Losing gradual blend |
| Curly bangs | Natural curls | Moderate | Ignoring shrinkage |
| Long face framing | Low-commitment change | Easy-moderate | Section too wide |
| Micro bangs | Existing short fringe | High | Almost no correction room |
| Point cutting | Softening ends | Easy | Cutting too deeply |
FINAL THOUGHTS
The most important skill in cutting bangs at home is not cutting. It is stopping. Stopping before you shorten another quarter-inch because the fringe looks slightly uneven. Stopping before adding more hair to the bang section because the first section seems thin. Stopping before attempting to correct a curl that has not fully settled. Stopping before turning curtain bangs into blunt bangs because both sides keep getting shorter while you try to match them.
At-home bang cutting works best when it is treated as careful maintenance rather than a dramatic transformation. Use sharp haircutting scissors. Work on hair that is behaving as close as possible to its normal finished state. Preserve the existing bang section. Cut tiny amounts. Release the tension. Check the result from normal viewing distance. And give the hair time to settle before making another adjustment.
If you already have blunt, curtain, wispy, side-swept, curly, or bottleneck bangs, a small controlled trim can be manageable with patience. If you are creating a completely new fringe, especially a very short, dense, or technically complicated one, professional help gives you a much larger margin for error. Because the easiest bang mistake to fix is the one you never make. You can always cut a little more tomorrow. You cannot put it back tonight.
One thought on “How to Cut Bangs at Home: 10 Methods and Safety Tips”