
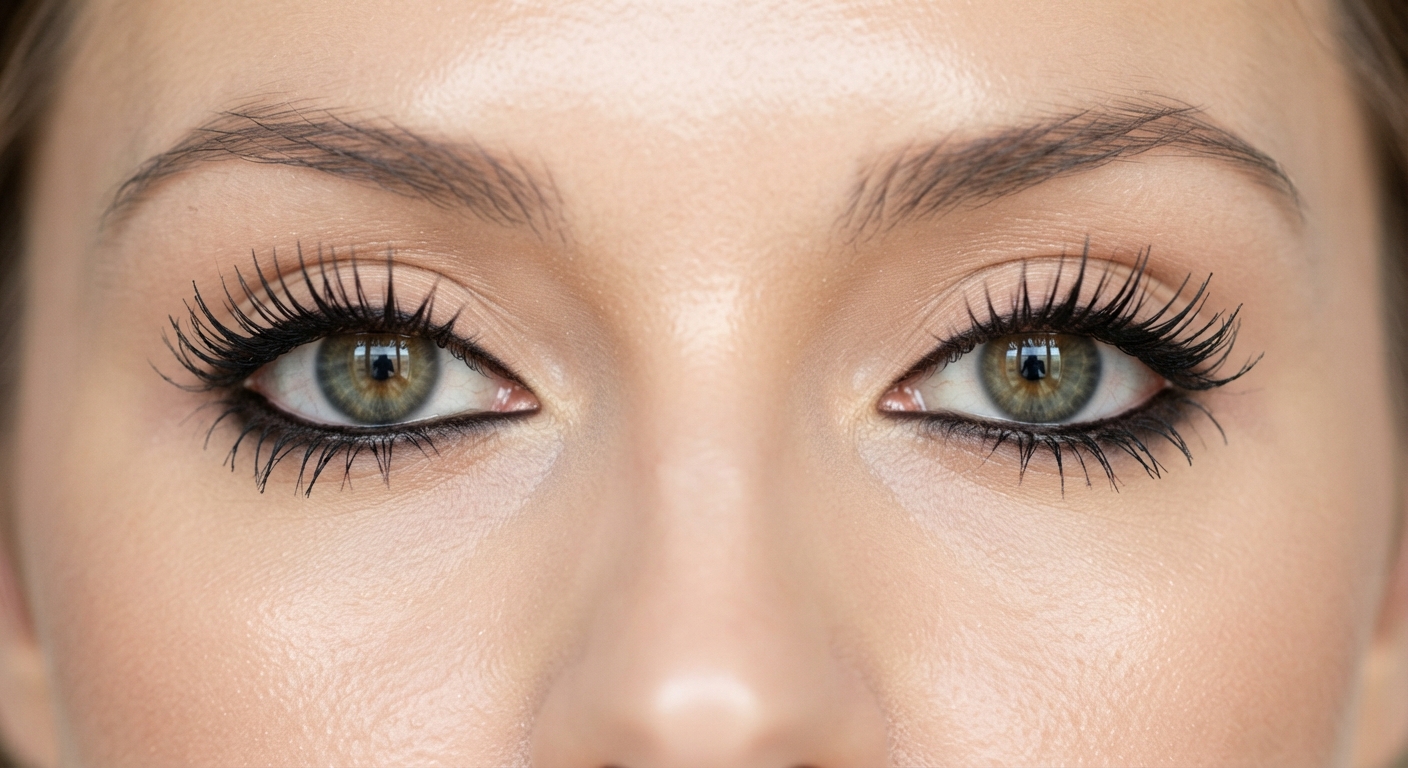
10 Simple Hooded Eye Makeup Ideas for a More Defined Look
You have watched the tutorial. You have followed every step with genuine care. And when you open your eyes and look in the mirror, the stunning crease work that was so visible in the video has disappeared entirely beneath the hood of skin above your eye. The wing you spent eight minutes getting perfect is invisible from any distance beyond arm’s length. The shimmer lid meant to make your eyes pop is sitting under a fold that wasn’t in the tutorial.
If this experience is familiar, you have hooded eyes — and you have been following tutorials designed for a different eye shape.
Hooded eyes have an extra layer of skin that hangs down from the brow bone, covering most or all of the eyelid. The natural crease is not visible — or is only partially visible — when the eyes are open. The available lid space is significantly smaller than in non-hooded eyes, and any technique that places product in the lower half of that space risks disappearing completely behind the hood when the eye is relaxed and open.
Contrary to common belief, hooded eyes are not restricted to people of Asian descent and can be found in people across all ethnicities. In fact, people may develop hooded eyes as they age. Emma Stone, Selena Gomez, Blake Lively, and Jennifer Lawrence all have hooded eyes — and every one of them has been photographed with the kind of defined, lifted, open eye makeup that many hooded eye makeup tutorials claim is impossible without first acknowledging the specific adjustments that make it work.
The key to flattering makeup for hooded eyes is understanding how to work with your eye shape rather than against it. Every look in this guide has been built from this principle — each one beginning from an understanding of what hooded eyes need, what they do not need, and the specific placement adjustments that make the difference between makeup that disappears and makeup that defines.
Ten looks. From the most beginner-accessible natural definition to the most advanced smoky glam. Every technique explained, every product category specified, and the one universal instruction that applies across every single look on this list stated clearly right here, before anything else:
Always apply hooded eye makeup with your eyes open.
My favorite trick is to do eye makeup when your eyes are open, so that you can see how it will look when your eye is open. This simple change allows you to see exactly where to place colors for maximum impact and prevents the disappointment of invisible eyeshadow.
The Foundation Rules for Every Hooded Eye Look
Before the ten looks — the four principles that apply to all of them, because without these foundations, even the most carefully executed look will not perform correctly on a hooded eye.
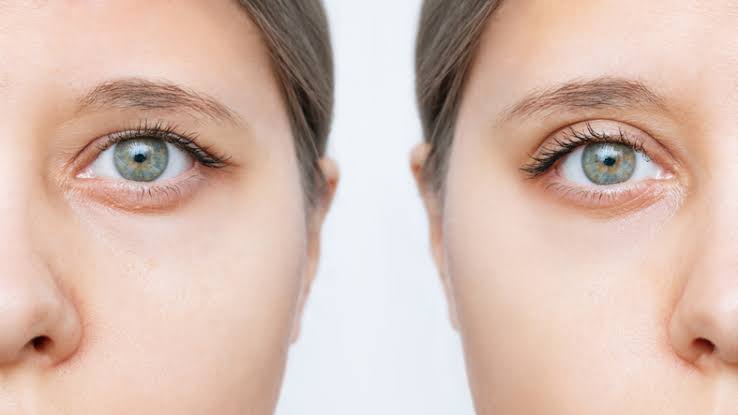
Rule 1: Prime before everything. We love to start prepping with a high-quality eyeshadow primer. It locks in color, prevents fading, and creates a smooth base that ensures your makeup stays flawless all day. The crease of a hooded eye creates a fold of skin that traps moisture and warmth — conditions that accelerate makeup breakdown faster than on a non-hooded lid. Primer is not optional for hooded eyes. It is the reason any of the techniques below last through a full day rather than through two hours.
Rule 2: Place the crease above the natural fold. Since the natural crease may not be visible, create depth by choosing a matte eyeshadow a few shades darker than your skin tone and blending slightly above your natural fold. The “false crease” that is drawn or blended above the natural fold is the foundational hooded eye technique that everything else builds from. The natural crease disappears when the eye is open. The false crease — placed higher — remains visible.
Rule 3: Keep eyes open during application. This cannot be overstated. Every shadow, every liner, every highlight placement should be checked with the eye open before it is considered complete. What you see with the eye closed is not what is visible when the eye is open.
Rule 4: Lift everything upward and outward. Any element placed straight across the eye or angled downward at the outer corner will emphasize the downward pull of the hood. Every technique — shadow placement, liner direction, lash selection — should be working against gravity, angling upward at the outer corner to counteract the hood’s downward visual weight.
Look 1: The Natural Lifted Definition — The Perfect Everyday Start
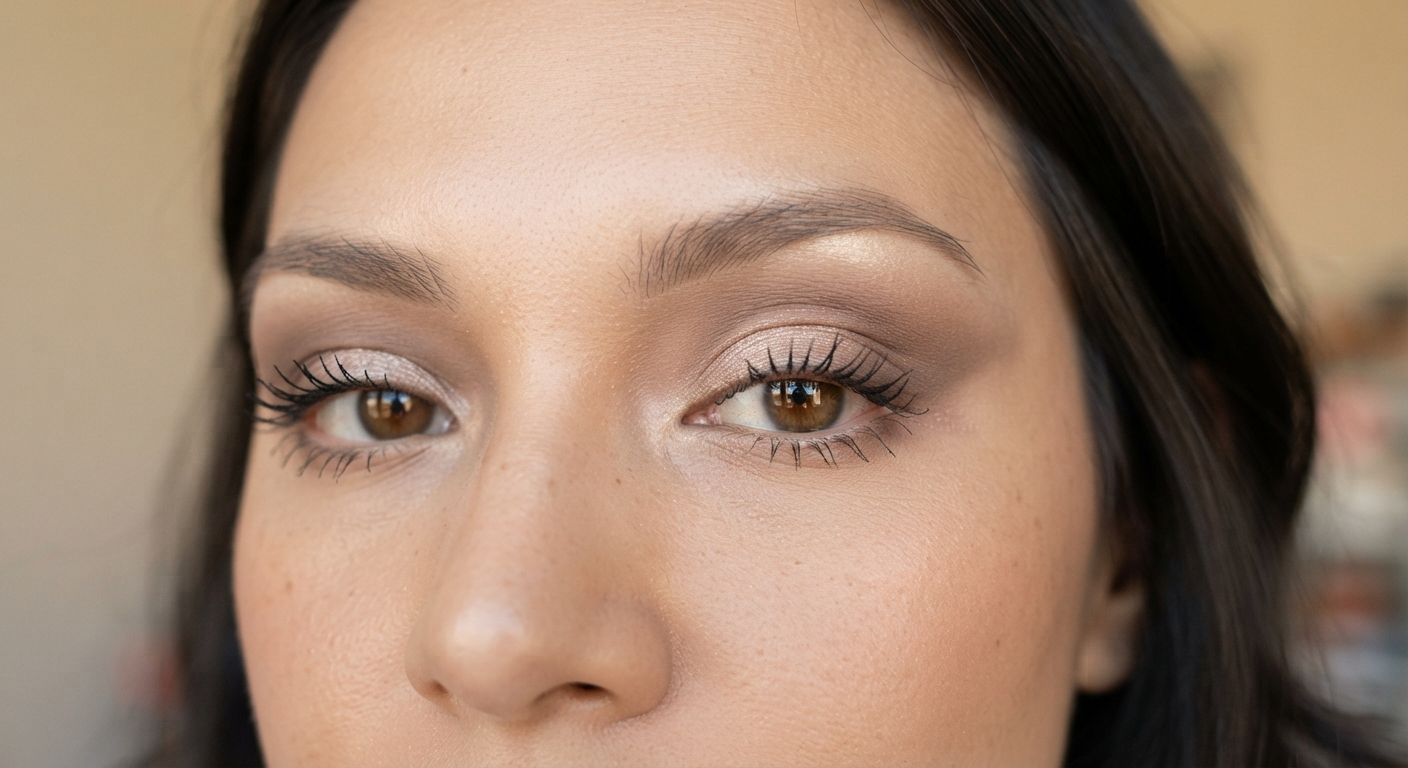
The most accessible hooded eye makeup look available: a light, neutral, lifted shadow definition that creates the appearance of a more open, awake eye without any strong color or obvious technique being visible to the observer. This is the “did you do something different?” look — the makeup that makes someone look better without anyone being able to identify exactly why.
Products needed:
A matte skin-tone-matching base shadow. A matte taupe or soft brown shadow two to three shades deeper than the base. A highlight shade in champagne or soft gold. Mascara.
The technique:
Begin with a generous application of eyeshadow primer across the entire lid and up to the brow bone. Allow to set for thirty seconds.
Apply the matte base shadow across the full lid area from lash line to brow bone with a flat brush — this unifies the lid color and prevents patchiness in the subsequent layers.
With a fluffy blending brush and the matte taupe shadow, apply the defining color in a windshield-wiper blending motion above the natural crease — placing the color starting approximately three to five millimetres above where you feel your natural fold. Blend upward and outward rather than down and inward. The shadow should reach its highest point at the outer corner of the eye, creating a subtle C-shape of definition that is visible when the eye is open.
Apply the champagne highlight directly on the mobile lid (the part of the lid that actually moves when you blink) — this adds a reflective quality to the visible lid space that draws attention to the eye’s center. A subtle highlight under the arch of your brow is another way to create that lifted effect. Use a soft, light-reflecting highlighter shade and blend well for a natural finish. This placement subtly draws attention upward.
Curl the lashes and apply two coats of lengthening mascara.
Why this works on hooded eyes: The matte taupe placed above the natural crease creates the visual impression of a defined crease at a position that remains visible when the eye is open. The highlight on the mobile lid reflects light from the only lid space that is visible. The brow highlight draws the eye upward, creating the lifted quality that the look’s name describes.
Look 2: The Floating Liner — The Liner That Stays Visible
Traditional eyeliner on a hooded eye disappears when the eye is open — the liner sits on the lid, the hood covers the lid, and the liner is invisible. The floating liner solves this by placing the liner not on the lid itself but floating above the natural lash line and hood, where it remains visible regardless of how much the hood covers.
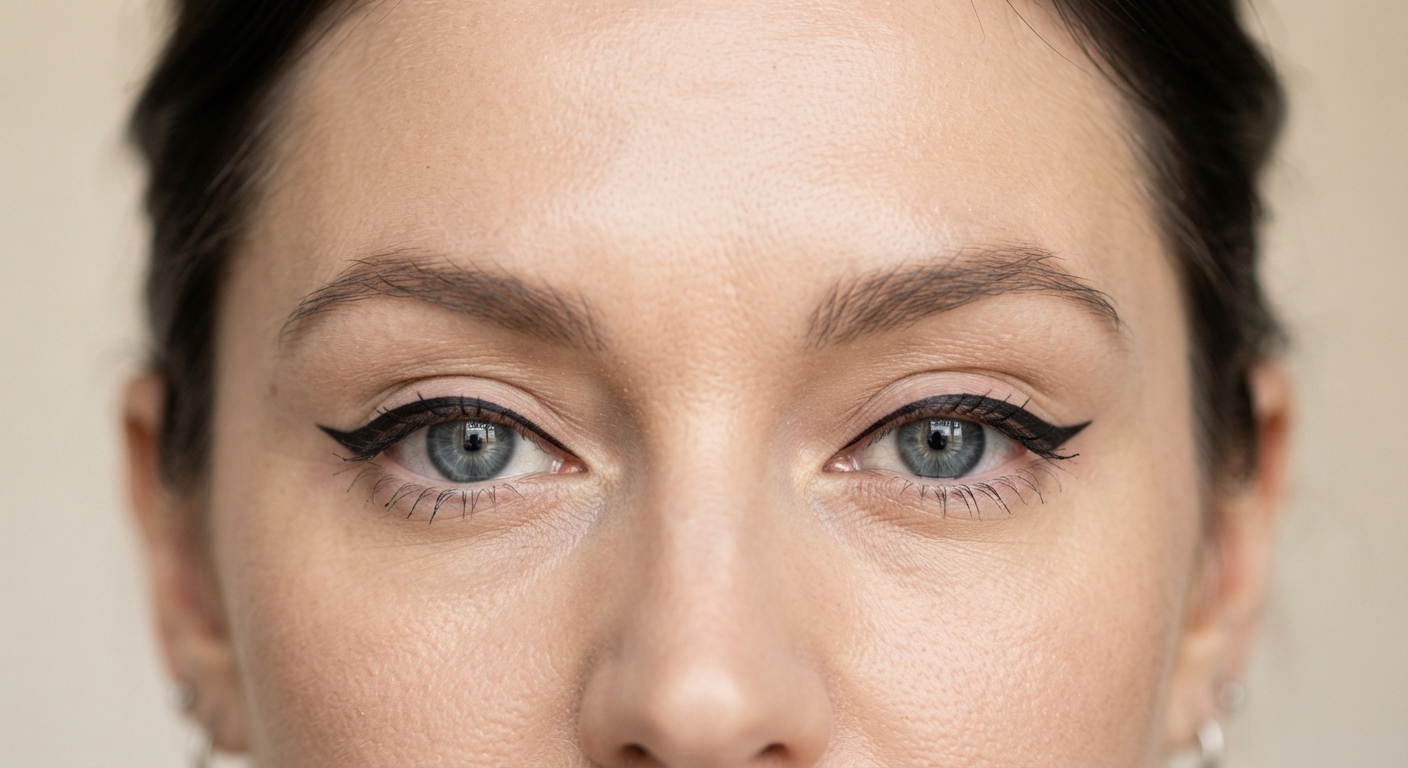
Place matte eyeshadow slightly above your natural crease to fake a lift. The floating liner takes this principle and applies it specifically to liner: instead of drawing the line at the lash line, the line is drawn at approximately the position where the visible lid ends and the hood begins.
Products needed: A black or dark brown gel liner or felt-tip liner. A fine liner brush if using gel.
The technique:
Open both eyes and look directly forward in the mirror. Identify the position on the lid where the hood meets the visible lid — this is where the liner will sit. The line should not touch the lash line at all in this technique. It floats.
Draw a thin line across this position, angling it upward at the outer corner so it lifts rather than droops. Keep the line thin through the inner two-thirds of the eye and thicken it slightly at the outer third. The outer corner should angle upward at approximately 15 to 20 degrees above the lash line direction.
Look straight ahead and check that the liner is visible. If it has disappeared behind the hood, move it slightly higher and redraw. The correct position is the highest position at which the line remains fully visible when both eyes are open and looking forward.
The liner technique the pros recommend: Start with an eyeshadow brush and matte shadow on the outer edge of the lower lash line. Don’t line your entire eye, only the outer edge and work upwards towards the eyelid and stop just past the natural crease. Then work your way inwards. This technique gives the eye an instant lift.
Who this look is for: Anyone new to hooded eye makeup who wants to understand the basic principle of placement adjustment before adding shadow complexity. The floating liner is the single most impactful beginner technique for making hooded eyes look more defined.
Look 3: The Halo Eye — The Hooded Eye’s Best Friend
The halo eye — a technique that places the lightest, most reflective color in the center of the lid and frames it with deeper color on the inner and outer corners — is one of the most flattering eyeshadow techniques for hooded eyes because it works with the geometry of the hood rather than against it.
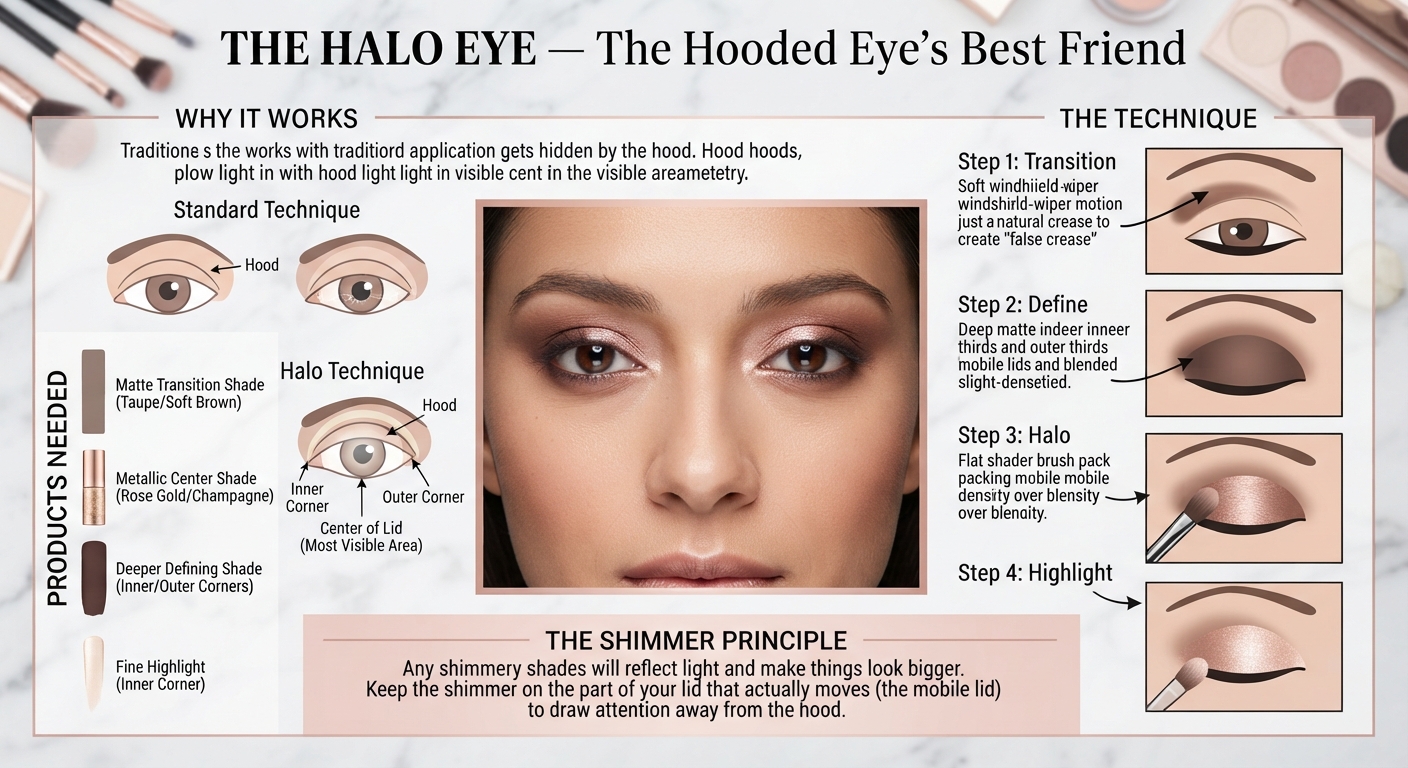
Here is why: the areas of the lid that are most likely to be covered by the hood are the inner corner and the outer corner. The center of the lid — the section directly below the pupil — tends to have the most visibility on a hooded eye. The halo technique places the most impactful color precisely where the most visibility exists.
Products needed: A matte transition shade (taupe or soft brown). A glittery or metallic center shade (rose gold, champagne, or warm copper). A deeper defining shade for inner and outer corners. A fine highlight for the inner corner.
The technique:
Prime the entire lid. Apply the matte transition shade above the crease in a soft blending motion, creating the false crease that gives the subsequent colors context.
Apply the deeper defining shade to the inner third and outer third of the lid. Blend the outer portion upward into the transition shade above the crease.
Apply the metallic center shade directly to the center of the mobile lid — the high point of the lid directly below the pupil. Pack this shade on densely with a flat shader brush rather than blending it, to maximize the metallic impact.
Apply the highlight shade to the inner corner of the eye and blend it slightly downward onto the upper waterline. This brightens the inner corner and creates the opening effect that draws attention to the eye’s center.
The shimmer principle: Any shimmery shades will reflect light and make things look bigger than they are, so if you want to bring the attention away from the hood, keep the shimmer on the part of your lid that actually moves. This is the halo eye’s secret: the metallic center is precisely on the mobile lid.
Look 4: The Lifted Winged Liner — The Cat Eye Adapted for Hooded Eyes
The classic cat eye wing disappears behind a hooded lid in its standard form. The lifted wing — adjusted specifically for the hooded eye’s geometry — remains visible and creates the specific lifted, elongated eye shape that makes the cat eye so universally requested.
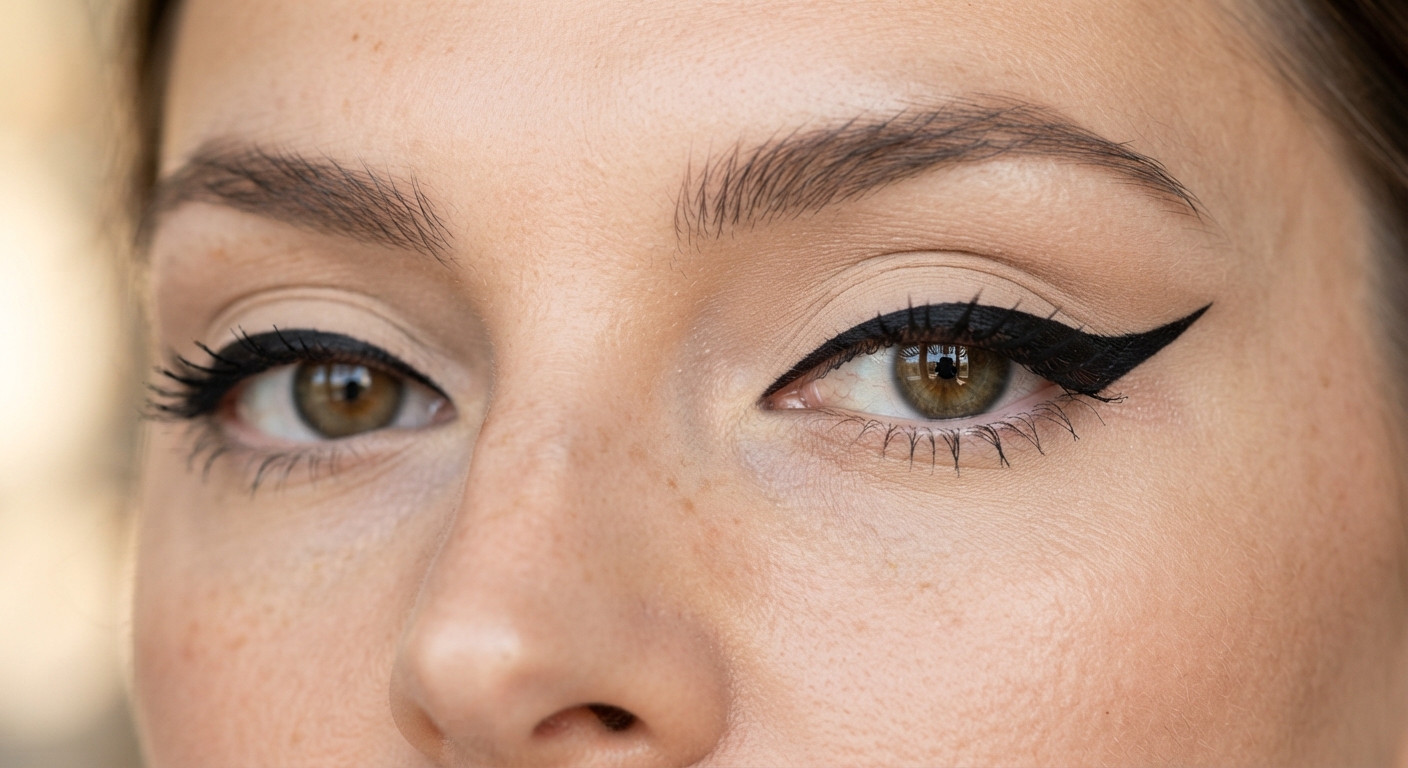
The adaptation is simple in principle and requires practice to execute: the wing must begin higher than it would on a non-hooded eye, angle more steeply upward, and the tail must be longer than seems necessary when the eye is closed — because the hood will conceal the portion of the wing that sits on the lid itself.
Opting for an upturned eyeliner look, like cat-eye or dramatic winged liner, can help lift hooded eyes.
The wing construction technique:
With a felt-tip liner or fine gel liner brush, draw the wing tail first — before the liner at the lash line. Position the tail at the outer corner of the eye, angling it upward toward the end of the brow. The angle should be steeper than a standard wing: approximately 45 degrees above the direction of the lower lash line rather than the 30-degree angle that works on non-hooded eyes.
Draw the body of the wing backward from the tail tip toward the center of the upper lash line. The wing’s body should be thicker than a standard wing — because the hood will cover approximately half its thickness, and a very thin wing on a hooded eye is invisible.
Fill in the lash line from the inner corner to meet the wing body. Keep the inner half of the lash line thin and thicken it progressively toward the outer corner.
Open both eyes and check. The tail of the wing should be clearly visible above the hood. If the body of the wing has disappeared, this is expected — the tail is the defining element.
The most useful pro tip for the hooded wing: A key mistake? Closing your eyes during application. Keep them open and look straight ahead to see where the eyeshadow will sit when your eyes are relaxed. Apply the liner with the eye open, checking the wing’s position with each stroke.
Look 5: The Smoky Eye — Adapted for Hooded Eyes
The smoky eye on a hooded eye requires the same principle applied across every other technique on this list: placement above the natural crease rather than within it. A smoky eye executed at the conventional position on a hooded lid produces a heavy, closed-in result. Lifted slightly above the fold, the same smoky eye opens and defines.
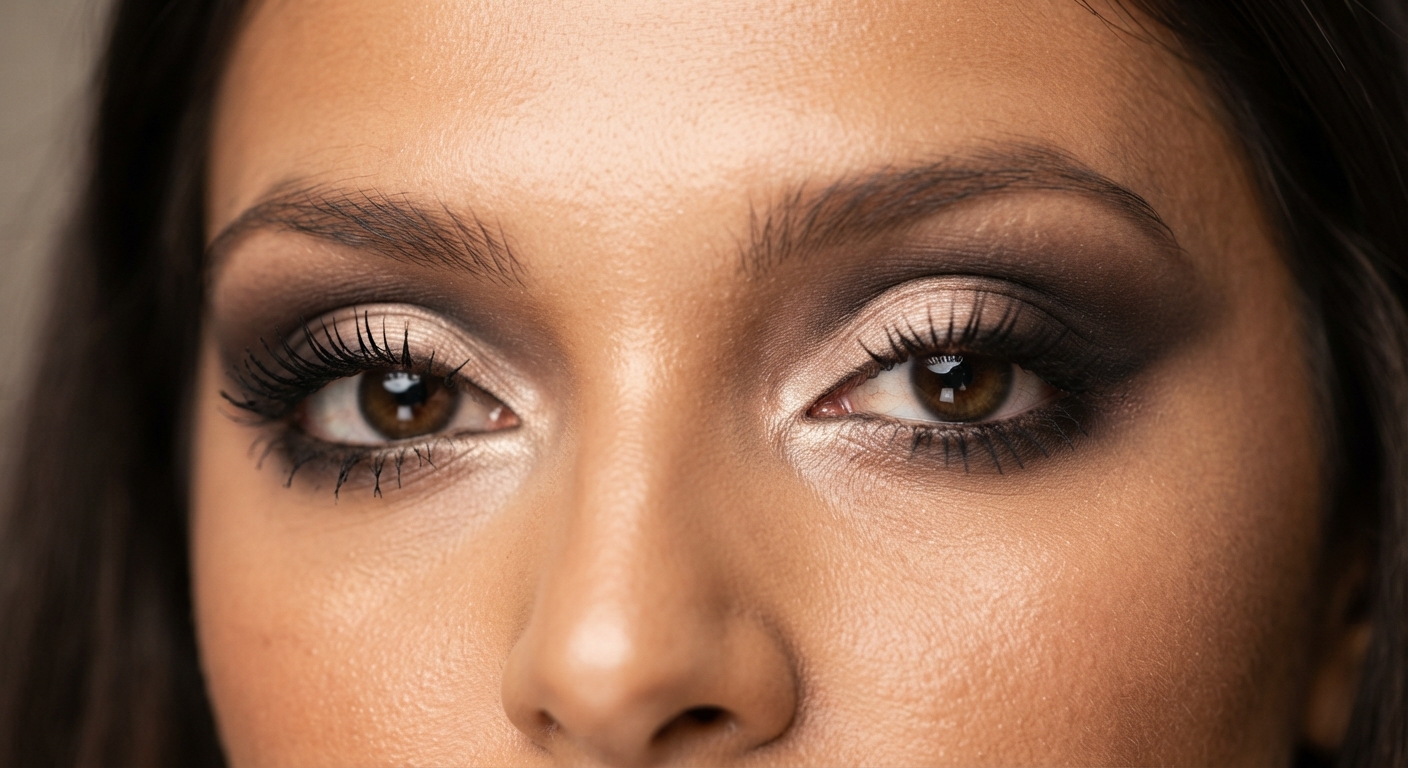
Dark eyeshadow can make your hooded eyes appear heavy. When doing eyeshadow for hooded eyes, reach for lighter shades and spend your time blending upwards and outwards to give your eyes a more lifted look.
Products needed: A light matte transition shade. A medium matte brown. A deep matte shade (dark brown, deep taupe, or soft black). A shimmer or satin highlight shade. Black liner for the waterline.
The technique:
Place the medium brown above the natural crease in a windshield-wiper motion, establishing the lifted crease position. Blend upward until the color is diffused.
Apply the deepest shade — the smoking shade — concentrating it at the outer corner and blending it inward into the medium brown. Do not place the deepest shade across the entire lid. Place it at the outer corner and blend toward the center, stopping at the center-outer third boundary. The deep shade should reach its highest point at the outer corner, angling up toward the outer brow tail.
Apply the shimmer or satin highlight to the center and inner lid — the mobile lid area — to contrast the matte depth of the outer corner with light-reflecting brightness where the lid is most visible.
Apply black liner to the waterline to deepen the lash line. Do not use a thick liner line on the upper lid — on a hooded eye, a thick upper lid line reduces the appearance of the eye rather than intensifying it.
Blend. Everything must be seamless — no harsh lines are visible on a successful smoky eye. The blend from the deepest shade to the medium shade to the transition shade should be undetectable as individual colors and read instead as a gradient.
The lower lash line: Don’t forget the lower lash line. A soft sweep of neutral shadow helps to balance your look by enhancing definition. A slightly deeper shade on the outer third of the eye adds dimension and a lifted effect.
Look 6: The Cut Crease — The Bold Definition Look
The cut crease is one of the most visually striking eye makeup techniques available, and it is also one of the most specifically adapted for hooded eyes among advanced looks. The cut crease creates an artificially sharp, defined crease line above the natural fold — a line that would not exist on a hooded eye without the technique — using concealer as a lid base to sharply separate the lid color from the crease color.
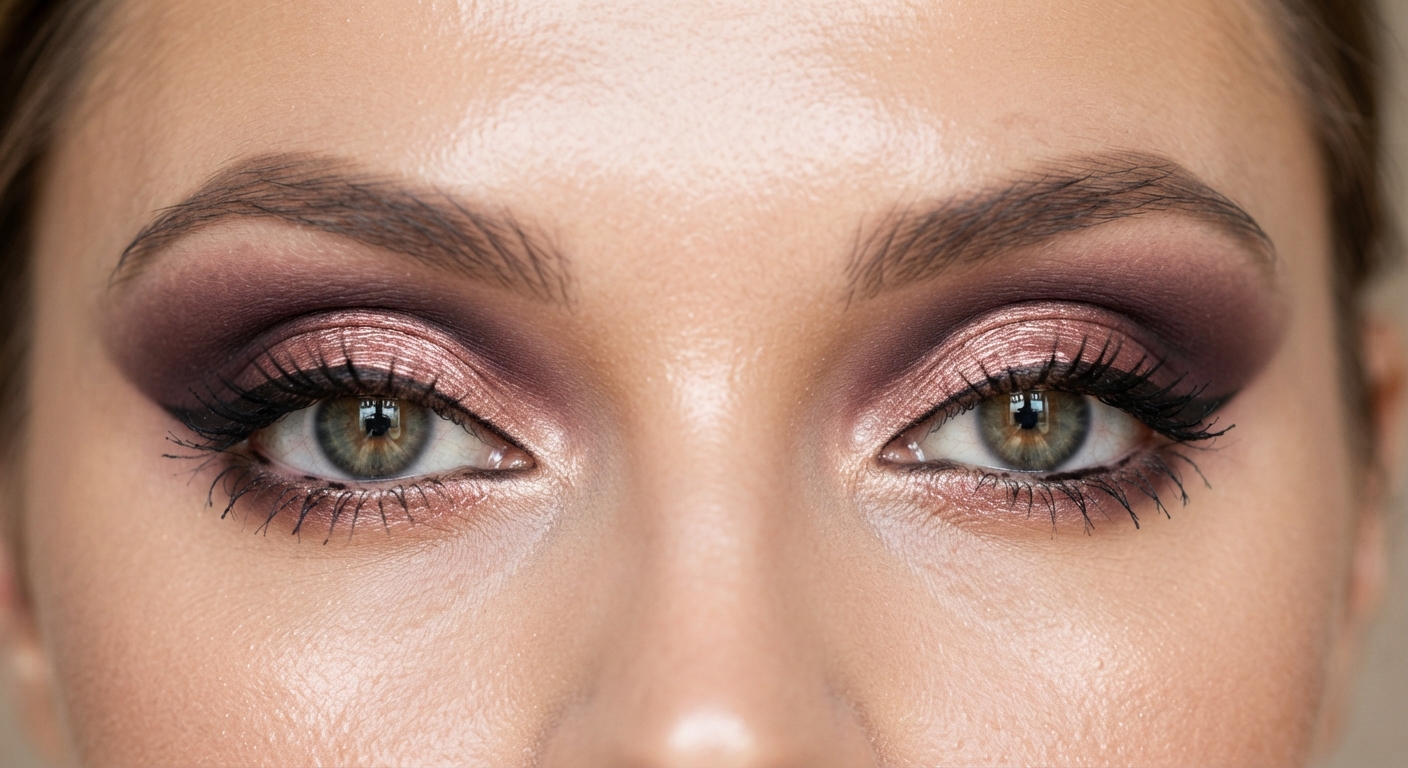
I love using a clean-toned concealer, one to two shades lighter, right on the inner lid and upper eyelid to camouflage the hood. It lifts, lightens, and visually opens the eye.
Products needed: An eyeshadow primer. A small flat concealer brush. Concealer one to two shades lighter than the skin tone. A matte dark shadow for above the crease. A shimmer or vivid shadow for the lid. Loose setting powder.
The technique:
Prime the entire lid and brow area. Allow to set.
Apply the dark matte shadow above where you want the crease line to sit — blending upward into the brow bone. This upper shadow establishes the crease position.
Using the flat concealer brush, apply the lighter concealer in a clean curved line across the natural lid — the area from the lash line to just below the position where the dark shadow sits. Clean the edge of this concealer line as sharply as possible — this is the “cut” in cut crease.
Set the concealer with loose setting powder to prevent creasing.
Apply the vivid or shimmer shadow directly onto the concealer-covered lid. The lightened, set concealer provides a clean base that makes lid colors appear more vivid than they would on a shadow-primer base alone.
Why this works on hooded eyes: The concealer on the lid area lightens and brightens the visible lid space — counteracting the shadow that the hood naturally casts on the lid. The sharp crease line created above the natural fold gives the impression of a much higher, more defined crease than actually exists anatomically.
Skill level: Intermediate to advanced. Practice the concealer edge on the back of the hand before applying to the lid — the sharp edge requires a flat, precise brush and a steady hand.
Look 7: The Tight-Line and Lash Focus — The Look That Opens Without Shadow
The tight-line is the liner technique that sits not on the outer surface of the upper lid but inside the upper waterline — the inner rim of the upper lash line, between the lashes and the eye itself. On a hooded eye, this technique creates the appearance of fuller, denser lashes and a more defined lash line without adding any liner on the visible lid surface that the hood might conceal.
It might seem like a small, unnecessary step — especially if you’re in a lazy mood or in a hurry — but it makes all the difference in making your eyes look open, awake, and princess-y.
Products needed: A waterproof kohl or gel liner for the tight-line application. An eyelash curler. Lengthening and volumizing mascara. For fuller impact: individual lash clusters or a strip lash with longer center lashes.
The technique:
Curl the lashes with an eyelash curler before any other product. For hooded eyes specifically, start the curl at the root rather than the mid-lash — a root curl lifts the lash away from the hood immediately.
Apply the waterproof kohl or gel liner to the inner upper waterline — the tight-line. Work the liner product into the space between the lashes by gently pressing the liner between the lash roots. This creates density and darkness at the lash base that reads as an intensified lash line rather than as visible liner.
Apply mascara in an upward direction — wiggling the wand from root to tip with an emphasis on the upward direction rather than the outward. For hooded eyes, the upward curl direction is more important than the lengthening direction.
The lash selection principle: Lashes can instantly open up hooded eyes. Start with a good curl — an eyelash curler lifts and awakens the eyes. Follow with a lengthening mascara to enhance the effect. If you wear falsies, choose lashes longer in the center rather than the outer corners. The center-longer lash profile draws the eye to the center of the lid rather than to the outer corner where the hood’s weight is most visible.
Why the center-longer lash works on hooded eyes: A lash that is longer at the outer corner pulls the eye’s attention to the corner, where the hood is typically most pronounced. A lash that is longer in the center directs attention to the pupil, creating the open-eye effect that hooded eye makeup is consistently working toward.
Look 8: The Warm Bronze and Copper — Dimension Through Warmth
The warm bronze and copper hooded eye look is the version of definition makeup that photographs most beautifully — the metallic warmth of bronze and copper shadows catching light in the specific way that makes eyes appear dimensional and wide-awake in any lighting condition, from ring light to natural sun.
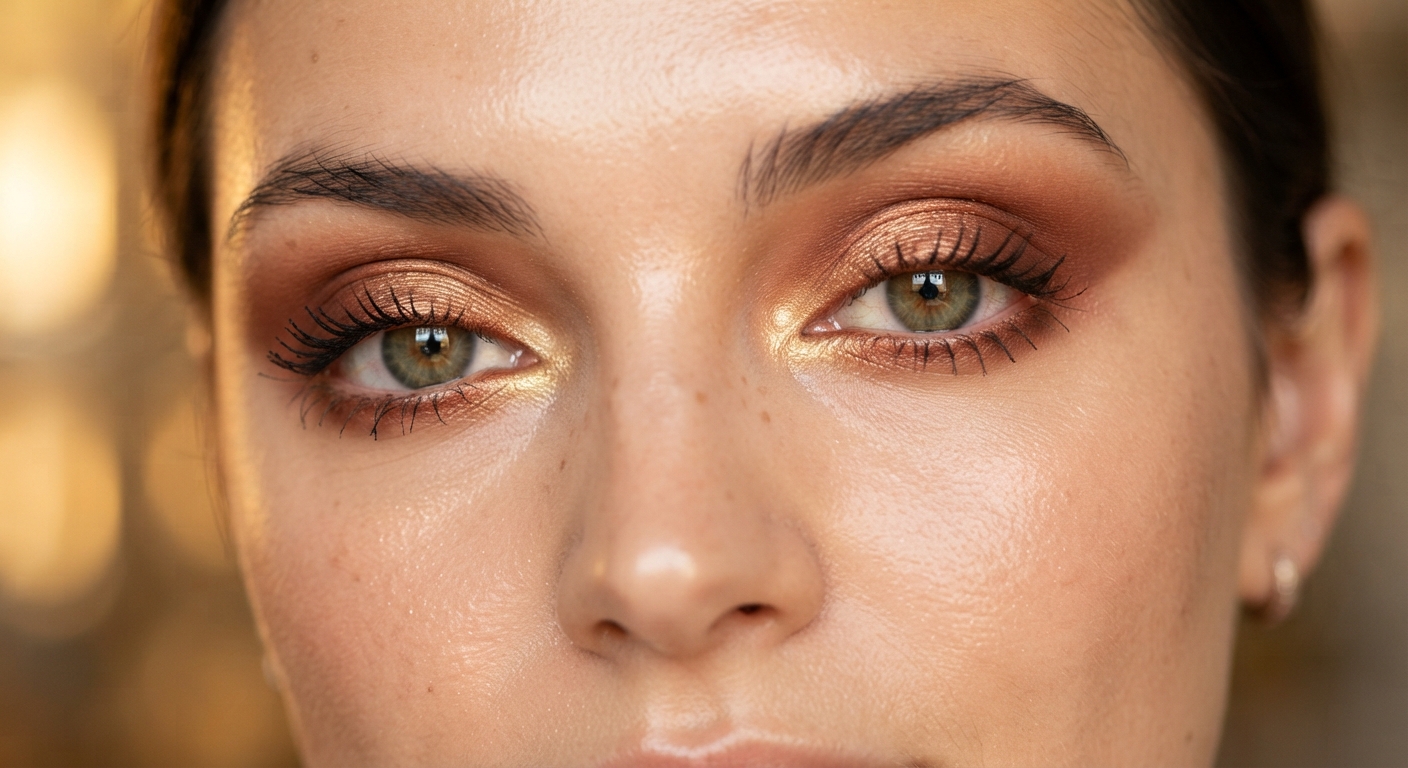
This hooded eye makeup technique blends bright metallic neutrals with deep outer-corner smoke and bold wings, opening the eyes while emphasizing symmetry and sharp definition.
Products needed: A matte warm brown or copper transition shade. A metallic bronze or copper shade. A deeper matte brown or dark copper for the outer corner and crease. A gold or champagne inner corner highlight. A copper or bronze eyeliner for the waterline.
The technique:
Prime the lid. Apply the matte warm brown above the crease in the characteristic lifted windshield-wiper motion.
Apply the metallic bronze or copper shade to the center mobile lid — packing it densely with a flat brush for maximum metallic impact. Blend the edges slightly but maintain the density of the metallic application at the center.
Apply the deeper matte brown or dark copper to the outer corner and blend it upward and outward into the matte transition shade above the crease. The outer corner depth should reach its highest point at the outer corner, with the highest point angled toward the outer brow tail.
Apply a gold or champagne highlight at the inner corner. Apply the copper or bronze liner to the lower waterline — warm-toned waterline liner on a hooded eye opens the eye by warming the inner eye color, making the white of the eye appear brighter by contrast.
The warm-toned principle for hooded eyes: Warm shades — bronze, copper, terracotta, warm brown — create dimension through their light-reflecting quality without the heaviness that cool dark shades can produce when placed in the wrong position on a hooded lid. The metallic quality of bronze and copper specifically means the shadow is doing additional lifting work through its reflective properties, even when it sits on a small visible lid area.
Look 9: The Clean Graphic Liner — Modern Minimalism for Hooded Eyes
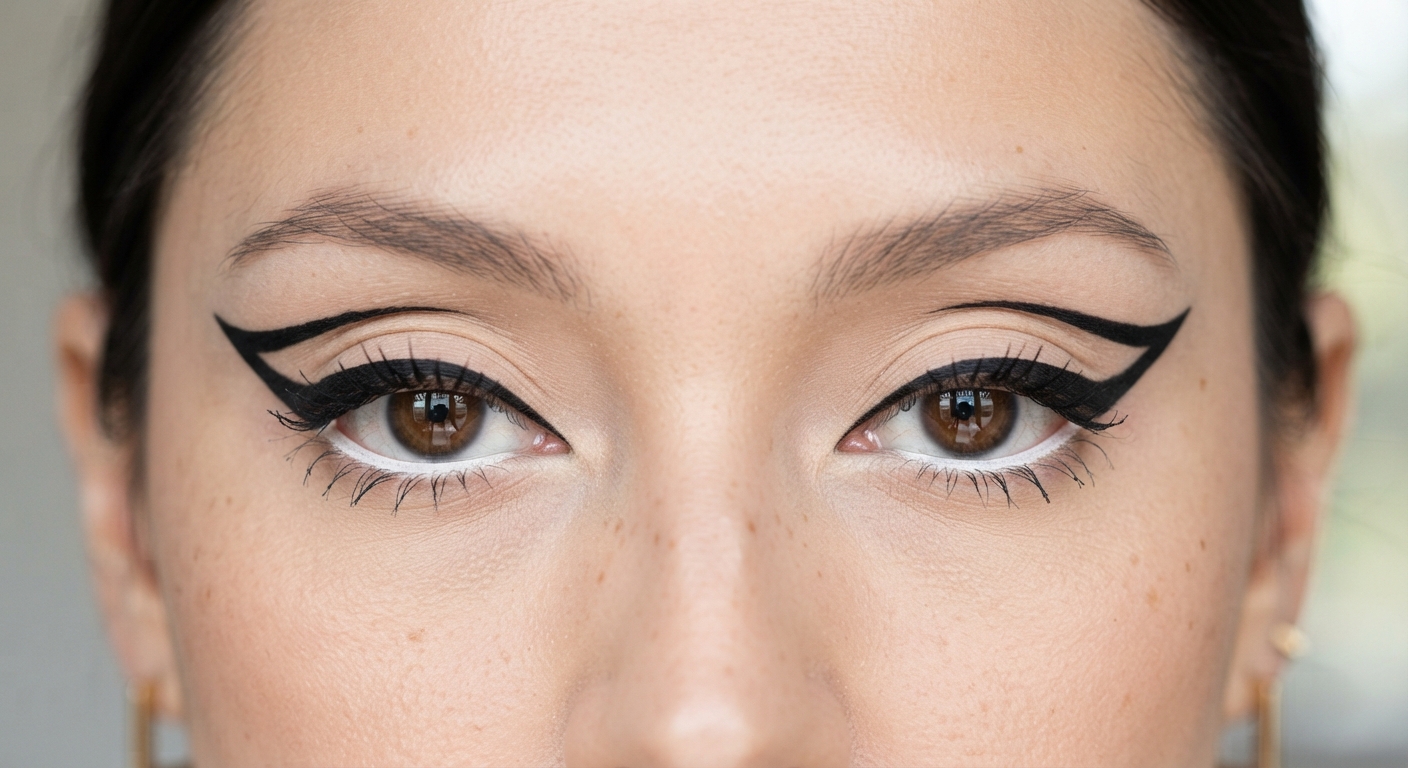
The clean graphic liner is the contemporary answer to the question of how to make a statement on a hooded eye without shadow. A single, precise, architectural liner element — a thick wing, a graphic upper lid line, or a bold lower lid element — creates immediate visual impact without requiring any shadow skill and without the blending complexity that fuller eye looks demand.
Clean lines steal the focus here. This hooded eye makeup technique relies on a precise black wing paired with a bare, softly matte lid to lift the eye shape without adding unnecessary shadow weight.
Products needed: A high-pigment felt-tip or gel liner with a very fine tip. Optional: a white liner for the waterline. A clean concealer for cleanup. A setting spray.
The technique — the thick lifted wing graphic:
On a minimal or no-shadow base, draw a significantly thicker wing than would appear appropriate for a non-hooded eye. The thickness accounts for the hood concealing the lower half of the wing — what appears excessively thick with the eye closed appears as the correct visual weight when the eye is open.
The wing should begin at the outer corner, angle upward at 45 degrees, and extend outward to a length that surprises you slightly — longer than you think is correct. Check with both eyes open. Adjust the angle and length until the wing reads as a clean, geometric statement rather than as a liner afterthought.
Apply white liner to the lower waterline — this immediately brightens and opens the eye and creates the maximum contrast with the dark graphic upper element.
The graphic liner principle: On a hooded eye, the graphic liner works precisely because it is not trying to define the lid — it is creating a statement above the lid where visibility is guaranteed. The bare lid beneath the graphic wing is intentional: the clear lid space beneath the liner makes the liner itself appear even more deliberate and precise.
Best for: People who want a bold, statement makeup look without the blending skill requirement of a full shadow look. The clean graphic liner is the highest-impact, lowest-technique option on this list.
Look 10: The Berry and Plum — Bold Color, Lifted Placement
The berry and plum hooded eye look is the answer to the question of whether bold, non-neutral color can work on hooded eyes — and the answer is a definitive yes, when the placement adheres to the same lifted, above-the-crease principles that make every technique on this list work.
Start with an eyeshadow brush and matte shadow (she likes plum) on the outer edge of your lower lash line. Don’t line your entire eye; only the outer edge, and work upwards towards the eyelid and stop just past the natural crease.
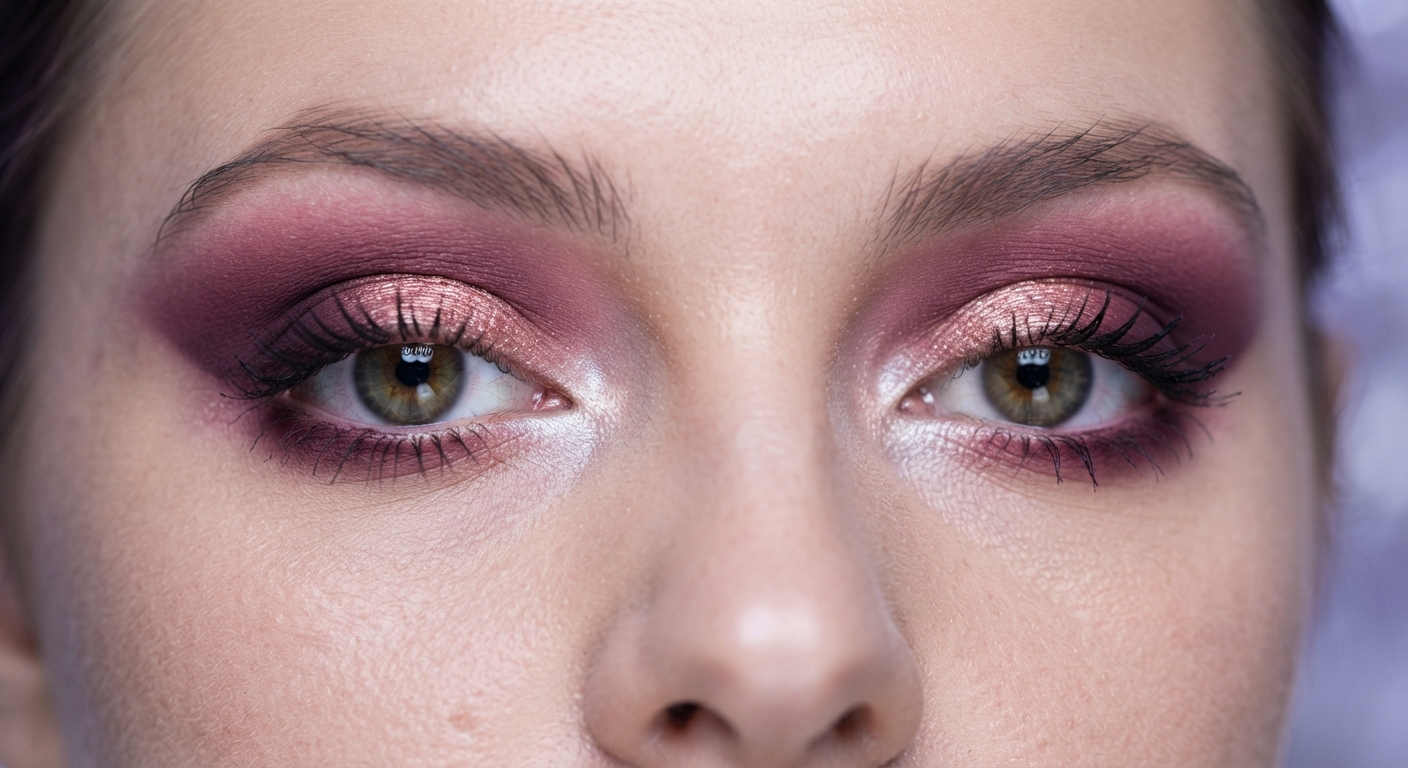
Products needed: A light matte base in a neutral skin tone. A matte medium berry or mauve transition shade. A deep plum or dark berry for the outer corner and crease work. A soft pink or rose gold shimmer for the lid. A bright highlight for the inner corner.
The technique:
Prime the entire lid. Apply the neutral matte base.
Apply the medium berry transition shade above the natural crease in the lifted windshield-wiper motion — higher than feels necessary, because the hood will conceal the lower portion of whatever is placed. The berry color above the crease should be visible when both eyes are open and looking forward.
Apply the deep plum to the outer corner and blend it upward and outward into the berry transition above the crease. The darkest, most saturated plum should sit at the outer corner and blend into the berry toward the center outer third.
Apply the rose gold shimmer or light pink shade to the center and inner mobile lid — the contrast between the cool berry-plum outer corner and the warm rose gold center creates the dimension that makes this look complex and beautiful.
Apply a bright cool-toned or neutral highlight at the inner corner to open the eye and balance the berry-plum depth at the outer corner.
Why bold color works on hooded eyes when placed correctly: The lifted placement above the crease ensures the color is visible. The contrast between the bold outer corner depth and the lighter, brighter center lid creates dimension from the center of the eye outward — which draws the eye’s attention to the pupil rather than to the hood. And the bold color itself — being unexpected on a typically muted-tone hooded eye treatment — creates the exact kind of deliberate, confident statement that makes the hooded eye shape genuinely striking.
The Products That Make Hooded Eye Makeup Work
The technique is the most important element — but the right products make the technique possible and keep it in place through an entire day.
Primer: Non-negotiable. A dedicated eyeshadow primer rather than a face primer or concealer — the eyeshadow primer’s formula is specifically designed for the eye area’s chemistry and movement. Apply from lash line to brow bone and allow to dry for thirty seconds before any shadow application.
Matte shadows: For all crease work, transition shades, and any shadow placed above the natural fold. Matte shadows blend more seamlessly and cause less visual emphasis on the fold’s texture. Shimmery shadows in the crease area on a hooded eye emphasize the textural irregularity of the fold rather than defining it.
Waterproof formulas specifically: The fold of skin in a hooded eye creates friction during the day as the hood meets the lid. Any non-waterproof liner or shadow placed at the crease area will transfer to the hood within hours, creating the smudged, shadowy under-brow appearance that many hooded eye makeup wearers experience. Waterproof eyeliner at the lash line and waterproof mascara are minimum requirements. Waterproof or long-wearing shadow formulas for any creases work that touches the fold.
A setting spray as the final step: Apply a fine mist of setting spray with eyes open and face directed slightly upward after the completed look. The spray seals all layers simultaneously and dramatically extends the wear.
The concealer trick for the hood: I love using a clean-toned concealer, one to two shades lighter, right on the inner lid and upper eyelid to camouflage the hood. It lifts, lightens, and visually opens the eye. Applied with a flat brush to the visible lid area before eyeshadow, a slightly lighter concealer base makes the lid appear brighter and less visually recessed — counteracting the shadow that the hood casts on the lid.
The Mistakes That Make Hooded Eyes Look Smaller
Heavy liner across the entire upper lid: A thick liner line applied from inner to outer corner sits beneath the hood and creates a horizontal dark band that makes the visible lid space appear smaller rather than larger. Keep liner fine through the inner corner and concentrate weight only at the outer corner.
Dark shadow on the inner corner: The inner corner is the most light-sensitive area of the eye — brightening it opens the eye. Darkening it closes it. Dark shadow at the inner corner of a hooded eye is one of the most common mistakes that makes hooded eyes appear smaller.
Downward-angled outer corner elements: Any wing, any shadow, any line that angles downward at the outer corner drags the eye downward and emphasizes the weight of the hood. Every outer corner element should angle upward at a minimum of 30 degrees above the lash line direction — and for a dramatic lifted effect, 45 degrees.
Skipping mascara: As noted by makeup artist Shea, “Mascara on the lashes always helps open up the eye a bit more also.” Full, curled lashes are the simplest single-product improvement available for a hooded eye and the mistake most often skipped when the rest of the look feels complete.
ENDING:
Hooded eyes have an undeniable allure — a sultry, mysterious quality that sets them apart. Every eye shape on the full human spectrum is capable of extraordinary makeup. The hooded eye is not the exception to this. It is the eye shape that requires the most specific knowledge and produces the most dramatic results when that knowledge is applied.
The ten looks in this guide range from the most beginner-accessible natural definition to the boldest graphic and color-forward options. Every one of them applies the same core principles: prime the lid, place the definition above the fold, keep both eyes open during application, and lift everything upward and outward at the outer corner.
These are not difficult techniques. They are adjusted techniques — the same skills that every makeup enthusiast has already developed, redirected to serve the specific geometry of a hooded eye rather than the geometry of the eye shape that most tutorials assume.
Find the look that matches where you are right now in your makeup practice. Start there. Practice the placement. Check with both eyes open. And then work through the rest of the list at your own pace, because every one of them is within reach of the person who understands where to place the product.
Save this to Pinterest, share it with every hooded eye makeup wearer who has been frustrated by tutorials that do not work for their eye shape, and look straight at the mirror while you apply.
That is the whole secret. Keep your eyes open.

4 thoughts on “10 Simple Hooded Eye Makeup Ideas for a More Defined Look”